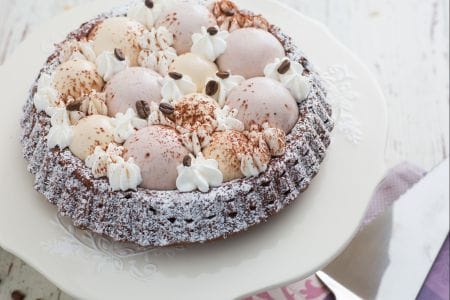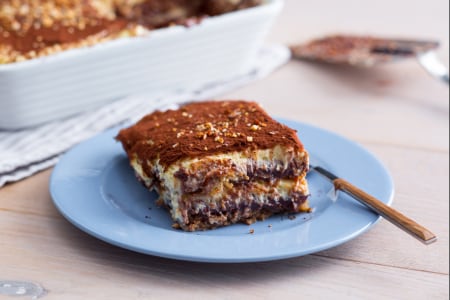


Tiramisu cake
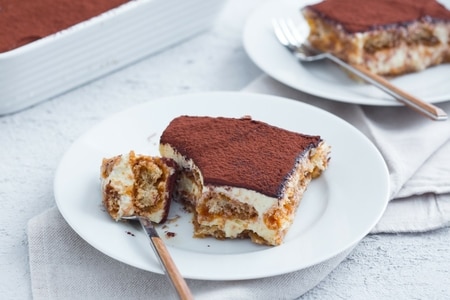
Tiramisu cake: a stunning dessert with homemade ladyfinger base and creamy mascarpone filling. The perfect recipe for birthdays and special events!
- Difficult
- 1 h 35 min
- Kcal 353
“Tiramisu can be defined as the Italian dessert par excellence, the only coffee dessert to win worldwide success.” This statement by master pastry chef Iginio Massari encapsulates all the goodness of this dessert and its centuries-old tradition: It’s equally loved by pâtissiers and home cooks alike. You’d be hard pressed to find an Italian domestic god or goddess who has never whipped up a creamy tiramisu for their family at least once. The basic ingredients of this recipe, i.e., an egg yolk beaten with sugar and coffee, is even given to Italian children as a nourishing breakfast food! Today we proudly present a version of this classic dessert that will be a sure-fire success. Our method will give you a gourmet tiramisu and explain the trick of achieving a smooth, frothy filling with a feather-light consistency. You’ll alternate these soft layers with delicious home-made ladyfingers to create a pillowy cloud of sweetness. Discover all the secrets of this mouthwatering tiramisu so you can prepare it to perfection and enjoy a sweet treat with your friends and family.
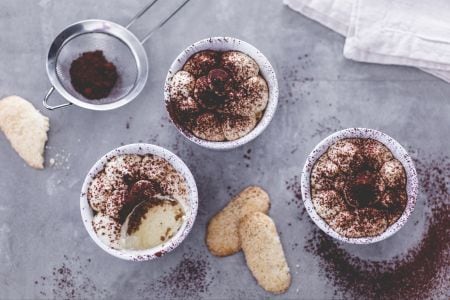
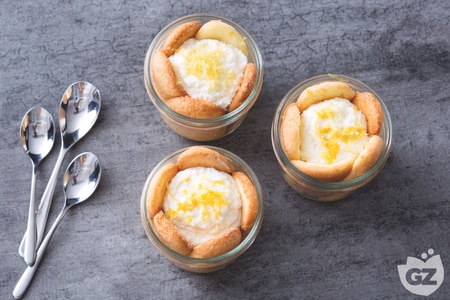
Check out these other tasty variations of classic tiramisu:
Discover more delicious Tiramisu recipes and elevate your cooking game!
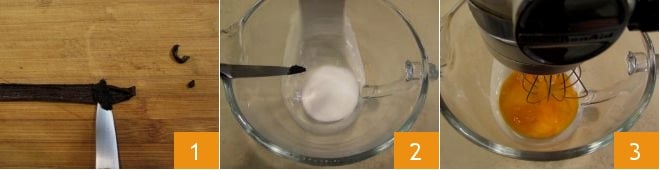
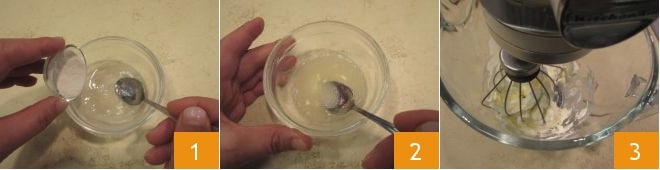
To prepare this delectable tiramisu, start by making the ladyfingers: Pour ½ cup (100 g) of white sugar into a stand mixer fitted with a whisk; cut a vanilla pod lengthwise and scrape out the seeds with the blade 1 of a small knife and add to the mixer with the sugar 2. Add the egg yolks 3

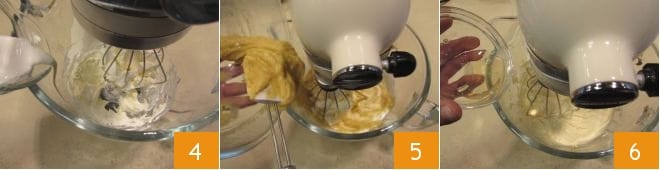
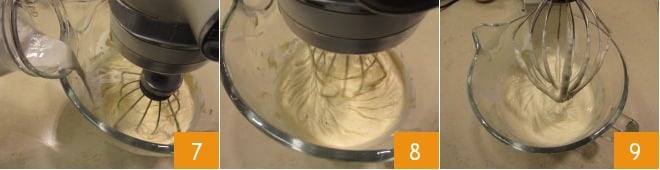
and start the mixer at maximum speed 4. Leave it running for approximately 12 minutes. When the whipped mixture is ready, it will have deep furrows 5. Now leave it for a moment and move on to whip the egg whites. Whip the egg whites in the bowl of a stand mixer or in a separate, perfectly clean bowl. Your utensils must also be very clean and the egg whites must be free of traces of yolk. Pour the egg whites into the bowl 6 and start whipping them without sugar.
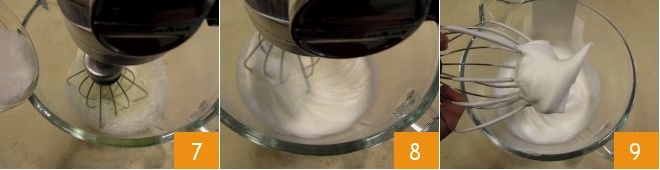
When they are slightly frothy, add 10% of the remaining ¼ cup (50 g) of white sugar 7 and increase the speed 8, then slowly add the remaining sugar. The egg whites should be smooth and compact. They should also be stiff 9 and not grainy; a grainy appearance is a sign that you have not whipped the egg whites properly and the ladyfingers will not come out as they should.
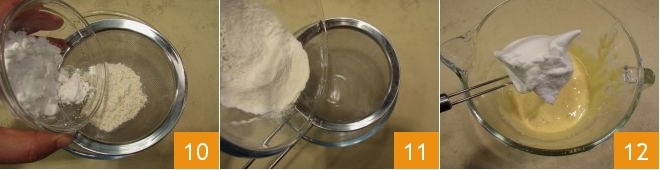
Mix ½ cup (50 g) of sifted flour and 3 tbsp (30 g) of potato starch 10 in a bowl and sift together 11 to make the mixture more uniform. Now the add the beaten egg whites to the egg yolk mixture 12 using a spatula
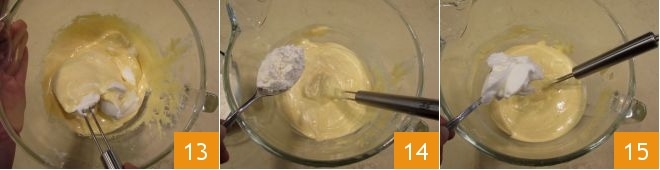
and mix from the bottom up with the spatula 13; pour in one-third of the sifted powders 14 and mix again gently from the bottom up, then add another third of the egg whites 15.
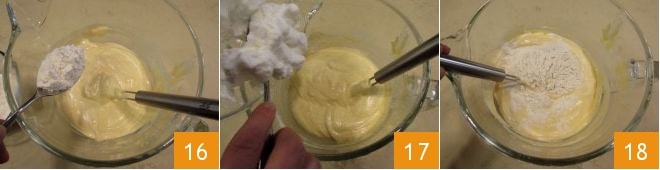
Mix again gently, then add another third of the powdered ingredients 16 and blend; lastly, add the remaining egg whites 17, mix again from the top downwards, and finish by adding the remaining powdered ingredients 18. Stir the mixture very gently, always working from top to bottom.
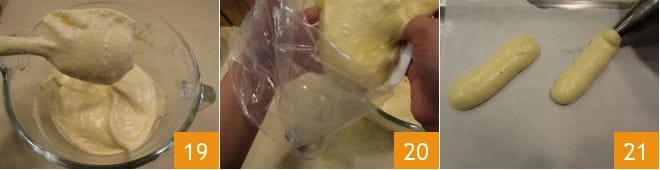
Once your whipped mixture is ready 19, take a pastry bag with a ½-inch (14-mm) plain piping tip and transfer the ladyfinger mixture 20 into it with the aid of a dough cutter. It’s better not to use a spatula because you’d end up adding a little mixture at a time, which could cause the mixture to separate. Take a baking sheet and line with parchment paper, then start piping out your ladyfingers to create equally spaced strips 21 measuring approximately 4-5 inches (10-12 cm) long.
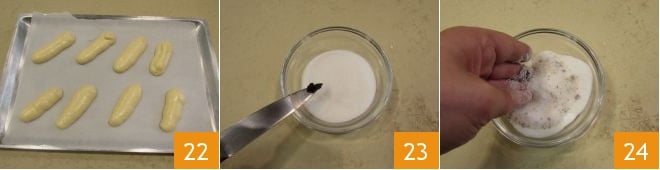
Once they’re ready 22, add the seeds of one vanilla bean 23 to the white sugar in a small bowl, and stir to flavor 24. This will make the ladyfingers even tastier.
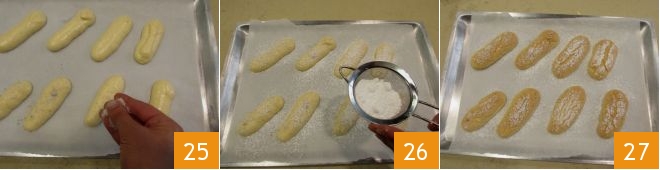
Sprinkle the ladyfingers with the flavored white sugar 25 and then dust with plenty of powdered sugar 26. This will ensure that the sugar creates a steam barrier during cooking and will allow the biscuits to keep their shape; ladyfingers without sugar would turn out flat after cooking. Bake in a conventional oven preheated to 390°F (200°C) for approximately 10-11 minutes, taking care to place a thick piece of aluminum foil to wedge the oven door open a little (this will have the same effect as baking with the valve open). Take your ladyfingers out of the oven when the surface is a nice even golden brown 27. Your home-made ladyfingers are ready and you can leave them to cool. These quantities will make approximately 50 ladyfingers. Once you’ve made your delicious tiramisu, you can eat the leftover ladyfingers as snacks or for breakfast. They can be stored in a tin box.
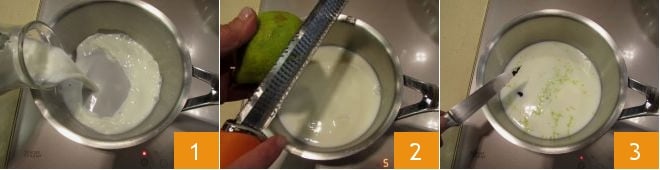
The next step is to make the pastry cream: Place a large bowl in the freezer for later. The cream is made in a bain-marie so that it’s extra sweet. Place a large pot of water on the stove and bring to a boil. Position a small saucepan or a small metal bowl on top. In the meantime, pour the milk into another saucepan 1 and flavor with the peel of half a lemon, taking care to grate only the yellow zest 2. Cut the vanilla bean lengthwise and remove the seeds, then add them to the milk 3. Bring the milk to a boil. This will save you time by gaining 195°F (90°C) in temperature.
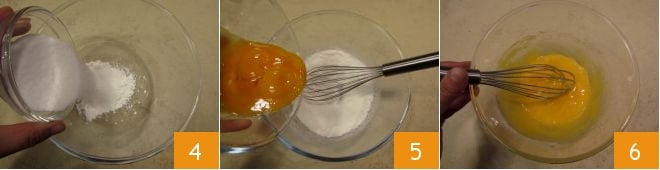
Meanwhile, mix the sugar and cornstarch together 4 in a separate bowl: This will prevent the pastry cream from becoming lumpy. Pour the yolks into the same bowl 5 and whisk them immediately by hand to blend the ingredients 6. You don’t need to whip them because the cream will regain its initial volume once cooled.
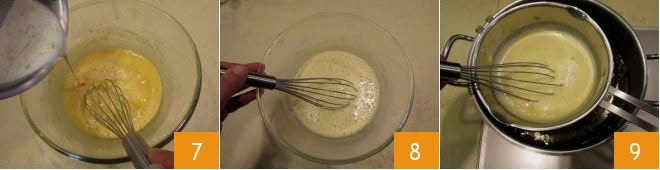
When the milk has come to a boil, you’ll have to act quickly: Pour 20% into the bowl to dilute the yolks, stirring vigorously 7. Then pour in half of the remaining quantity and mix 8, and finally add the remaining milk and place everything in the metal bowl you’ll use as a bain-marie 9. It will only take a few moments for the cream to reach the right temperature (you can measure using a digital kitchen thermometer; with this quantity of yolks, the cream should quickly heat to 198°F (92°C)) and take on a perfect glossy, creamy (not granular) texture.
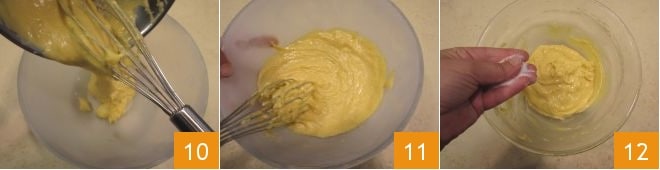
Quickly transfer the mixture to the bowl you chilled in the freezer 10, whip vigorously with the whisk for a few moments 11 to cool rapidly to below 122°F (50°C). Then add just a pinch of sugar to the cream 12 to stop a crust from forming on the surface. Place the cream in the fridge (at 39°F (4°C)) for approximately 10 minutes.
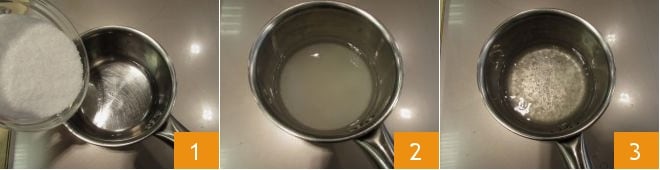
Brew some coffee in your Italian moka pot and let it cool. Add ½ cup (100 g) water to a saucepan, followed by 1¼ cups (100 g) of sugar 1 and turn on the heat 2. Dissolve the sugar and let the resulting syrup come to a boil 3.
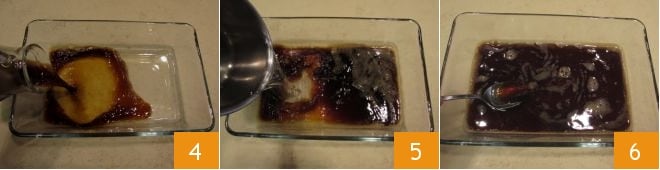
Pour the prepared coffee 4 and syrup 5 into a large, shallow container. Mix everything together 6 and then place in the fridge to cool.
To prepare the mascarpone filling, take boiling water, pour in the gelatin powder 1, and stir to dissolve 2. Let it rest, then pour the mascarpone into the bowl of a stand mixer and start whisking on the lowest speed setting 3.
Then add just enough heavy cream 4 to make the mascarpone thicker and easy to work, removing any lumps. Stop the stand mixer, then add the pastry cream 5. Mix again with the whisk, then pour in the gelatin 6
and drizzle in the remaining heavy cream 7. Carry on whisking the filling 8; it will become smooth, fluffy 9, and creamy in just a few moments. Your mascarpone filling is ready.
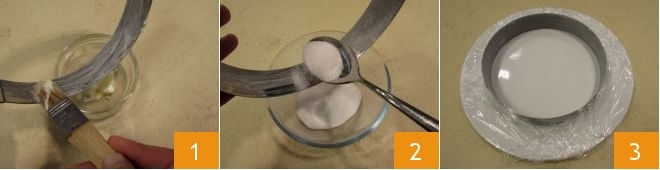
Now that all the different parts are ready, you can assemble your tiramisu: Take the ladyfingers and the filling from the fridge. Butter the inside of a 7-inch (18-cm) ring mold 1 and sprinkle with sugar, shaking off any excess into a bowl as you go 2. This will make it easier to remove the ring without spoiling the dessert. Place the ring on a plate and cover everything around it with plastic wrap to keep everything clean when you add the filling and sprinkle with the cocoa powder 3.
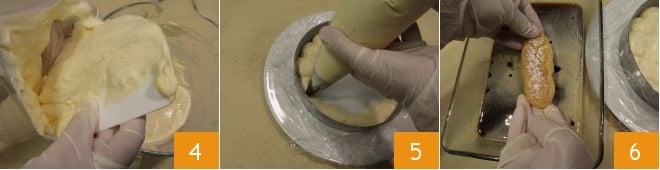
You can wear gloves to put together the dessert: Use a pastry cutter 4 to transfer the cream to a pastry bag with a ½-inch (14-mm) piping tip. Add your first layer of filling to the base of the ring 5 mold and steep the ladyfingers in the coffee until they are very soft and soaked right through 6.
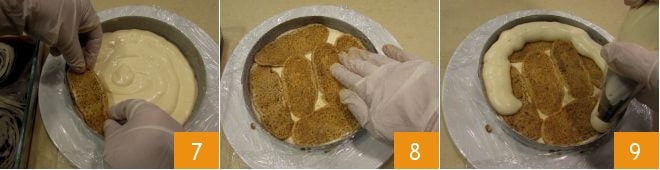
Transfer them one by one to the surface of the filling to create a layer of six ladyfingers, arranging them starting from the edge 7 to cover the entire surface 8. Then add another layer of filling 9
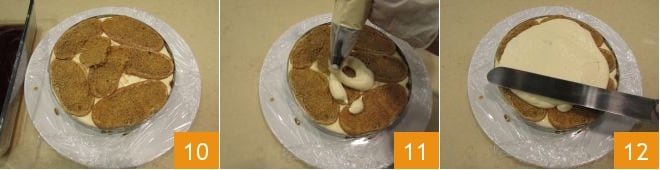
and a second layer of ladyfingers 10. Cover with more filling 11 and level with a spatula 12.
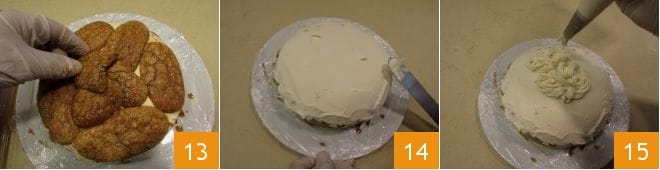
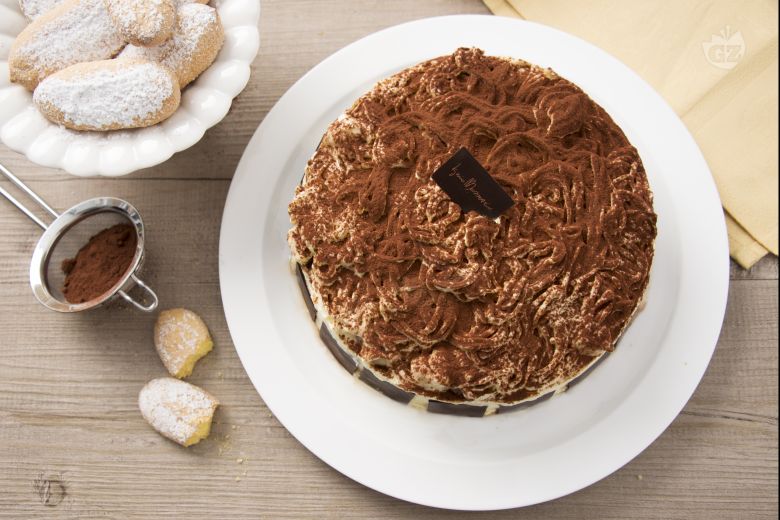
Add another layer of soaked ladyfingers to create a dome-like shape 13 that you can build up by smoothing the mascarpone filling into shape with a spatula 14. Now fit a piping with small holes to create a wavy pattern 15 on the dessert using the remaining filling.
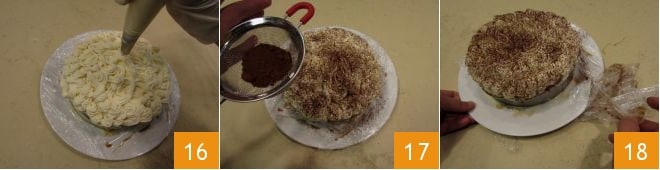
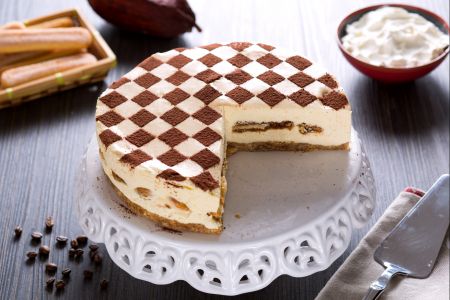
Once the decoration is complete 16, place the tiramisu in the refrigerator for approximately 15 minutes, then dust with cocoa powder 17, remove the plastic wrap 18,
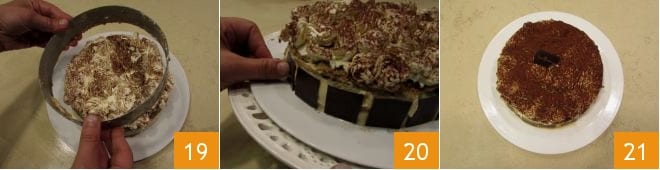
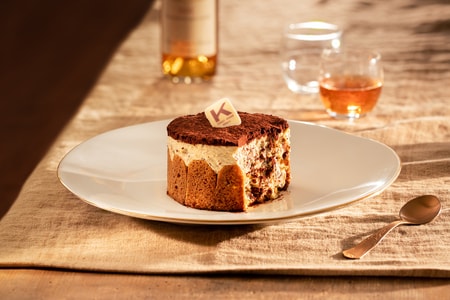
and gently take the dessert out of the ring mold 19. Finish decorating by placing squares of dark chocolate around the edge 20. Your gourmet tiramisu is ready to go 21!