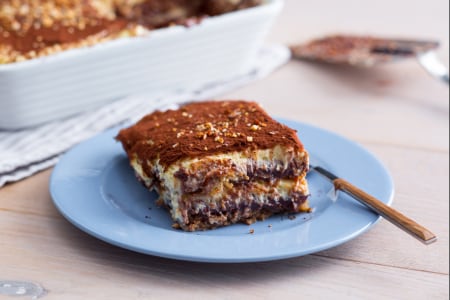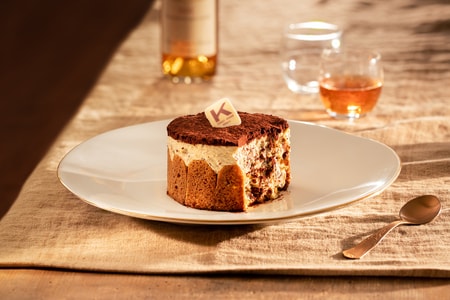
Soft tiramisu tart
The Soft Tiramisu Tart is a delicious and visually stunning dessert, perfect for celebrating a special occasion!
- Average
- 1 h 30 min
- Kcal 335
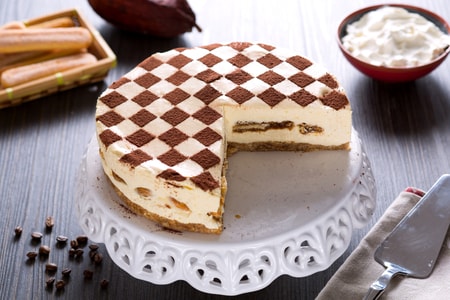
Sweet tooth friends, if you're among those who feel overwhelmed when it comes to ordering dessert and would like to simply taste everything, with today's recipe, we're certain to fulfill one of your desires. We've taken the best of cheesecake, the most versatile cream cheese-based cake in the world, and tiramisu, a classic Italian dessert beloved by young and old... and we've created something even more unique and delicious: the tiramisu cheesecake! The delicate mascarpone cream and the coffee-soaked ladyfingers of the legendary spoon dessert meet the rich, fresh, and firm texture of cheesecake, resulting in a celebration of goodness that will delight the whole family. And for the most special occasions? With our cocoa checkerboard decoration, the cheesecake tiramisu dresses up for the party and is ready to grace even the most refined tables... just like the soft tiramisu tart, equally original and spectacular! The spoons are tingling, can't you also start to feel a certain mouthwatering sensation? Enough talk, it's almost snack time: let's prepare the irresistible cheesecake tiramisu together!
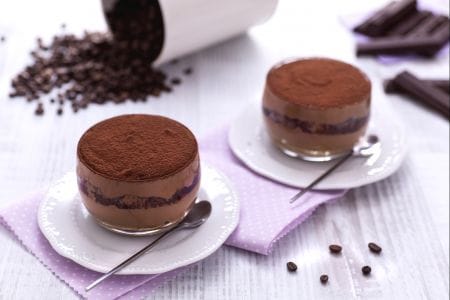
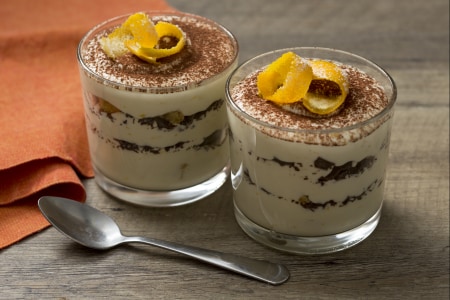
Check out all our tasty variations of classic tiramisu:
For other cheesecakes:
Discover more delicious Tiramisu recipes and elevate your cooking game!
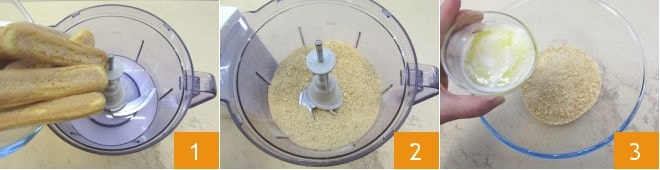
To prepare the cheesecake tiramisu, start with the base. Make the coffee (espresso or from a Moka pot): you'll need a total of 170 grams (approx. 3/4 cups and let it cool down later), then melt the butter in a saucepan, being careful not to burn it. Once melted, let it cool down. Meanwhile, place the ladyfingers in a blender 1 and process them until they become powdered 2. Transfer them to a bowl and add the cooled melted butter 3
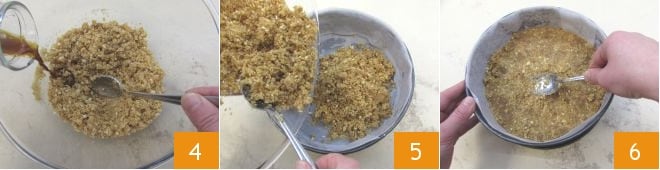
and 50 grams of coffee 4. Mix thoroughly. Grease and line a 9 inches springform pan with parchment paper, then pour the ladyfinger mixture into the pan 5. Spread it evenly on the bottom, pressing it firmly with the back of a spoon to compact it 6. Finally, to firm it up, transfer the pan to the refrigerator for at least 30 minutes.
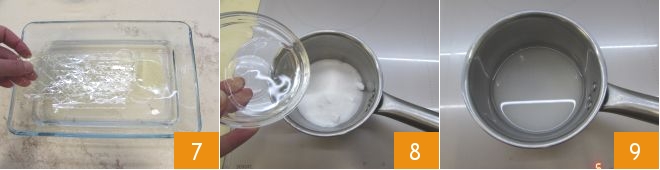
In the meantime, focus on preparing the cream. First, soak the gelatin in a dish with cold water 7. Meanwhile, place 5 tbsp (65g) of sugar and 3 tbsp (45g) of water in a saucepan with a thick bottom 8. Bring the syrup to a boil 9,
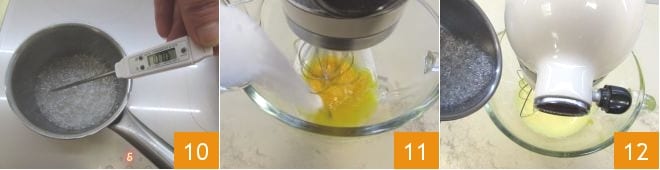
and use a food thermometer to check the temperature 10. When it reaches 239°F (115°C), add the egg yolks and the remaining sugar to a stand mixer and start whisking 11. When the syrup reaches 248°F (120°C) , remove it from the heat and gradually add it to the stand mixer 12, little by little, in three batches, turning off the whisk each time to prevent the syrup from sticking to the sides of the bowl.
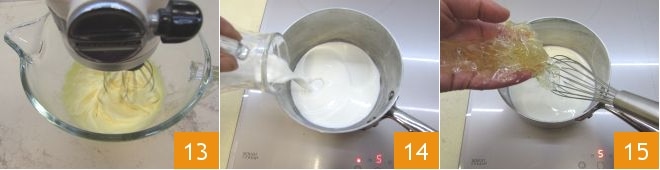
Continue whisking until the mixture is completely cooled 13. Then, in a saucepan, heat the cream (no need to bring it to a boil) 14 and add the soaked gelatin to it after squeezing out the excess water 15.
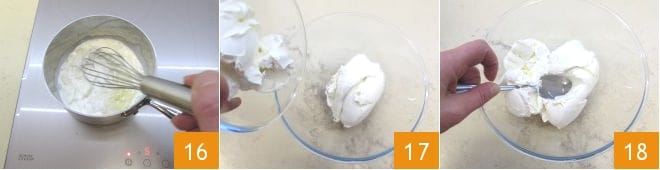
Mix thoroughly to completely dissolve the gelatin 16 and let it cool down. In a bowl, combine the cream cheese and mascarpone 17 and mix them together 18.
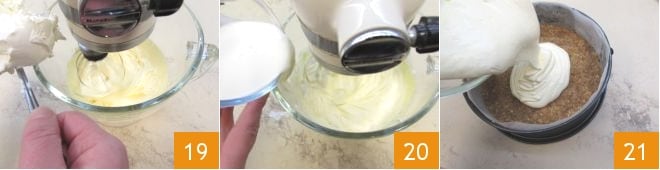
Add the cheeses, one spoonful at a time, to the stand mixer 19 while continuing to beat. Finally, add the cream in which you have dissolved the now cooled gelatin 20. Let the beaters run just long enough to combine all the cream ingredients, then turn them off. Retrieve the firm base of your cheesecake from the refrigerator and pour a first layer of cream onto it 21,

smoothing it with a spatula 22. Quickly dip the ladyfingers in the remaining 120 g of coffee 23 and cut them in half 24.
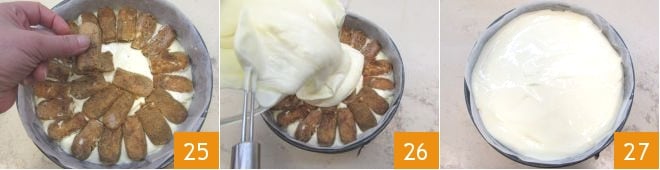
Arrange the ladyfingers in concentric circles inside the cake pan 25, then cover with the second and final layer of cream 26 and smooth it out. Place your cheesecake tiramisu in the refrigerator to firm up for at least 3-4 hours 27.
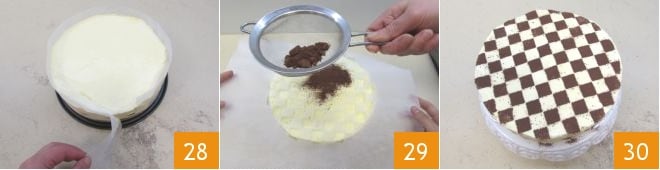
After the time has elapsed, gently remove the bottom disc of the cake pan and the parchment paper from the sides 28. At this point, you can simply dust the surface of the cake with sifted cocoa powder, or, to achieve a checkerboard pattern like ours, follow these steps: draw a circle on a sheet of parchment paper with the same diameter as the cake pan; use a ruler to draw horizontal and vertical lines to form the squares, and finally, using a craft knife or a sharp blade, cut out half of the squares alternatingly to create a checkerboard pattern. Get some help to hold the parchment paper over the cake and dust it with cocoa powder 29. Then, remove the parchment paper: your cheesecake tiramisu is ready to be enjoyed 30!