
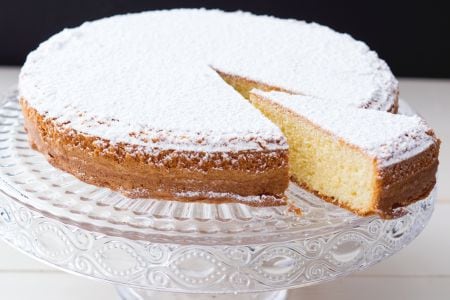
Paradise cake (Torta Paradiso)
The Paradise Cake is a delicate dessert, made with a sponge cake base with the addition of butter and baking powder, flavored with citrus and vanilla!
- Easy
- 1 h 15 min
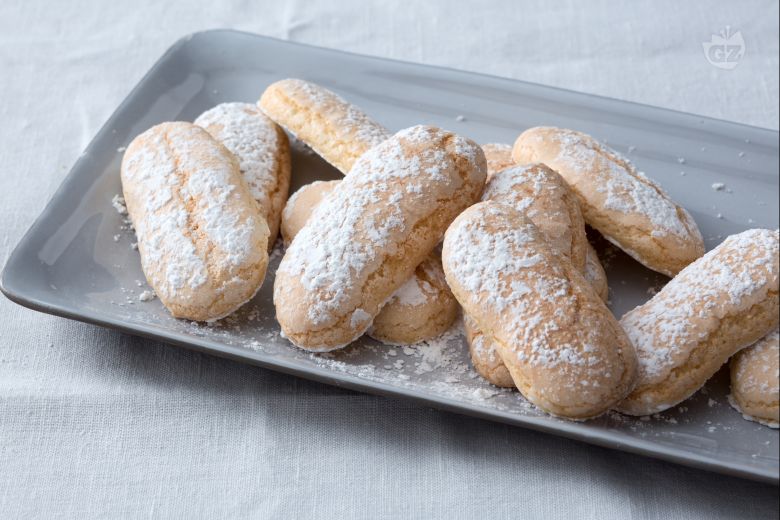
Today we open the doors of the Giallo Zafferano kitchen to a great master of Italian patisserie: Paolo Sacchetti, who with his broad smile revealed all the secrets for preparing ladyfingers! Because in the kitchen, just like in life, the important thing is to put all your passion into whatever it is you are doing... we will explain how to prepare them, but you will only achieve perfect ladyfingers is you put all your love into it! Thanks to their proverbial lightness, these biscuits are perfect for dipping in milk in the morning, for a sweet breakfast, or served with zabaglione, for preparing one of the most classic desserts: tiramisu'! Ladyfingers can also be used as a base for making spoon desserts, like trifle, or for decorating an elegant dessert. Extremely versatile and a timeless classic, even though novelties always stimulate the palate. Whatever you are aiming for, pay attention: the more air incorporated, the better they will be for dipping!
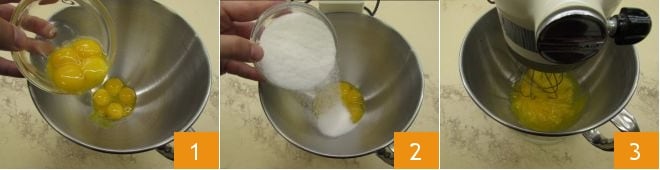
To prepare ladyfingers start by separating the eggs. Now place the eggs in the bowl of a planetary mixer 1, add 0.5 cup of sugar 2 and switch on at a high speed 3.

You should notice a 4 fold increase in yolk volume 4. To check they are firm enough, you can carry out an additional test; switch the machine off and dip a spatula in the mixture: if the yolk sticks to it without dripping, then it is ready. Now set aside the yolk and sugar mixture and whisk the egg whites. Place them in another planetary mixer bowl 6 and whisk at a low speed 6.
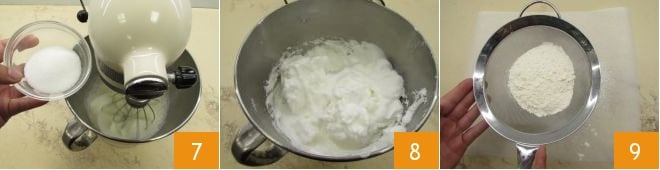
The resulting structure will depend on when the sugar is added: if added at the start, when the whites are not yet beaten, a dense mass is obtained, which is more compact but less voluminous. Vice versa, if the sugar is added when you have almost finished beating the egg whites, the result will be an airier, shinier and full-bodied structure. In this case, when the egg whites nearly triple in volume, gradually add the sugar 7. As soon as all the sugar is added, increase the speed of the planetary mixer and continue whisking the mixture until smooth, homogeneous and it reaches the stiff peak stage 8. Now sieve the flour onto a sheet of parchment paper 9
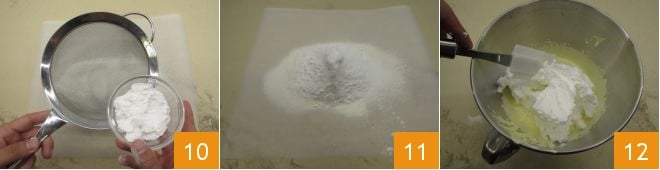
along with the potato starch 10; then sieve once more, together 11. The more thoroughly they are sieved, the less likely the mixture is to deflate when they are added to the batter. Now take the bowl with the yolks and add around 1/3 of the whites 12
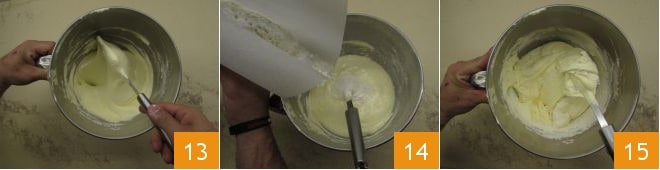
and use a spatula to delicately fold them in, from the bottom up 13. Before fully absorbed, gradually add 1/3 of the sieved powders 14 and delicately stir, folding from the bottom up 15.
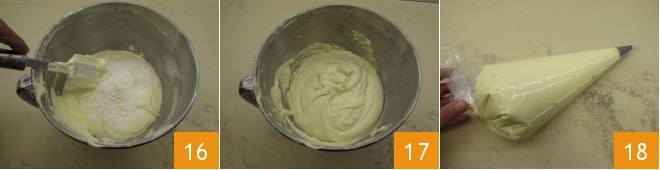
Continue in this way, adding the whites two more times and the powders two more times 16, until you end up with a frothy and compact mixture 17. Place it inside a pastry bag with a smooth 0.5 in spout 18
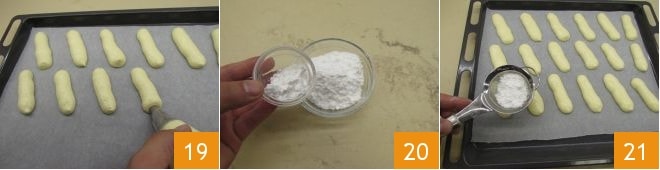
and use it to form fingers on an oven tray lined with parchment paper 19; they'll need to be around 2-2.4 in in length and with enough space between each one, seeing as they will grow in size when baked.?After finishing the first tray, mix together the icing sugar and corn starch 20 and sprinkle over the ladyfingers 21,
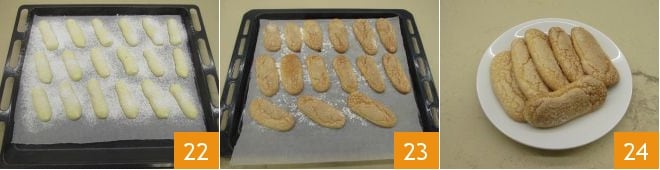
coating the entire surface 22. In this way a vapor barrier will form that will enable the ladyfingers to rise even more, making them even softer. Bake in a static oven preheated to 450°F (230°C) for 9 minutes on the highest shelf but with the door slightly wedged open by a small tin foil ball, to simulate the open valve of a professional oven. In the meantime arrange the other ladyfingers on a tray and sprinkle, just like with the first batch; remove the first tray from the oven and place the second one inside. Once baked 23, leave your ladyfingers to cool before placing them on a tray and serving 24.