Halloween Muffins
Halloween muffins are soft and delicious treats, perfect for celebrating... find out how to prepare this easy recipe, perhaps with the kids!
- Very easy
- 35 min
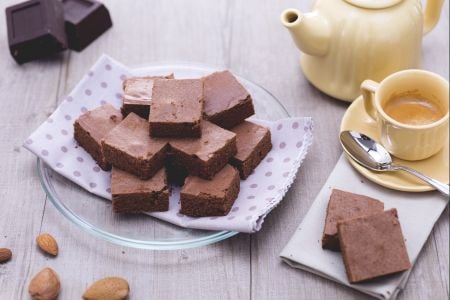
Torta a fette is a fun twist on the usual traditional Italian cakes you see at big get-togethers. Instead of one big cake, it’s sliced into colorful Italian cake slices—and listen, each piece is decorated differently. Like, really different. Each slice is its own mini celebration. The base? It’s a tender and moist dark chocolate cake, making every bite rich and sweet. And here's the thing, what makes it different is the creative decorating. There’s a layer of creamy buttercream in the middle holding it all together, and people just go wild with decorations like sprinkles, sugar beads, pearls, and candy hearts. You never know what you’ll get, and that’s part of the fun.
Folks in Italy love using this for birthdays or any party where you want everyone to feel special. And, it’s easy to see why. Each person gets a slice that’s not just tasty but also uniquely designed—pretty cool, right? Sometimes, people mix things up by using different colors of buttercream or changing up the toppings, so there’s always something new to look at and try. It’s a great way to let kids (and adults!) get in on the decorating, too.
That playful spirit sets this apart from other Italian dessert recipes or the usual Italian layered cakes. Unlike a plain old sponge, this cake really really stands out on a party table with all those crispy, colorful, and tangy toppings. You’ll see torta a fette at birthdays, but honestly, it works whenever you feel like making dessert a little more fun.
As far as Italian cake varieties go, this one keeps things interesting. It’s less about being super formal and more about letting loose and showing off your creative side. For anyone into Italian baking but looking for something that feels personal and festive, this cake gives you just that. It’s proof that a little imagination goes a long way in making dessert memories that stick—really, it does.

To make the sliced cake, first prepare the base: chop the dark chocolate 1 and melt it in a bain-marie with the butter in pieces 2. Gradually pour in the milk 3 and

the sugar 4, stirring to dissolve everything. Transfer the mixture to a stand mixer with a whisk attachment and let it cool; add the eggs one at a time, ensuring the previous one is incorporated before adding the next 5: turn on the mixer and mix. Sift the baking powder 6,

the flour 7, then add the powders to the mixture one spoon at a time. Mix from bottom to top with a spatula to blend the mixture 8. Pour the batter into a rectangular cake pan measuring 8x10 inches 9 and bake in a preheated static oven for 45 minutes at 340°F (or in a fan oven at 300°F for 35 minutes).

Once cooked, remove the base from the oven 10 and let it cool. In the meantime, prepare the buttercream: start by placing the water and sugar 11 in a thick-bottomed saucepan, heating it over low heat and stirring occasionally with a steel spoon. When the sugar has dissolved, check that the syrup reaches a temperature of 250°F 12.

Meanwhile, place the egg yolks in a stand mixer 13 and begin to beat them at maximum speed; add the sugar syrup gradually 14 and whip until completely cooled. While the whipped yolks are cooling, cut a vanilla bean lengthwise and scrape out the seeds with a knife 15.

Then incorporate the vanilla seeds 16 and the softened butter at room temperature into the stand mixer 17, continuing to whip until the mixture is creamy. Transfer the buttercream you obtained into a bowl 18.

Once the cake has completely cooled, cut it in half to get two cakes 19, then slice it horizontally into 3 parts 20. Fill the base with some buttercream using a spatula 21, then

lay the second rectangle 22; fill the second layer as well and finally cover with the last one 23. Cover the surface and sides of the cake with buttercream, spreading it evenly 24.

Once the cakes are filled, take the sugar paste and roll it out with a rolling pin on a work surface sprinkled with powdered sugar 1. Then cover the cakes 2, smoothing the surface with a smoother. Trim the edges with a smooth-bladed knife 3

to remove excess parts 4, then cut 6 slices with a thickness of 1.75 inches (5-6). With our doses, you should get 12 slices in total

Decorate the surface of each slice with gel decoration 7. Now take the final colorful sugar decorations and apply them to each slice, creating different decorative patterns (8-9).