Liquid sourdough starter
Liquid sourdough starter, also known as li.co.li. is a natural leavened product which can be used to prepare a variety of long-leavening doughs.
- Very difficult
- 0 min
- Kcal 167
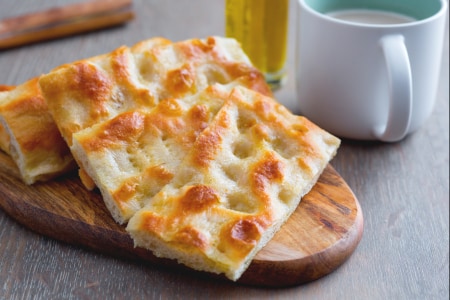
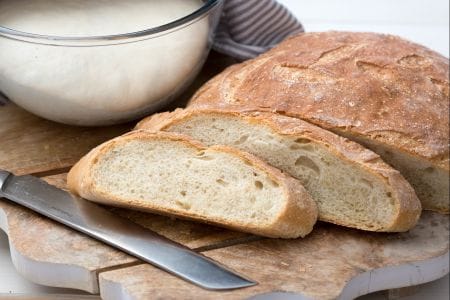
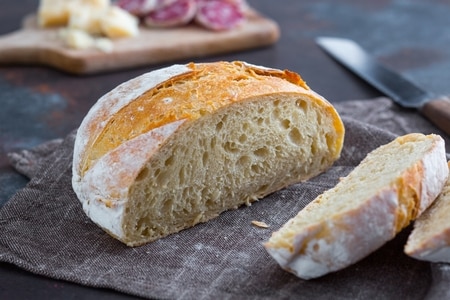
Only two simple ingredients, such as water and flour, can turn into something truly extraordinary. Also called sourdough, or sourdough starter, this compound is fed regularly to magically allow your baked goods, both sweet and savory, to rise slowly and in the right way. But before entering this immense world you must ask yourself if you are willing to dedicate your time to yeast, in fact only with the right "pampering" and without being in a rush will you be able to give life to this wonderful transformation. Once this is established, together with chef Gabriele Bonci you will learn all the secrets and the best techniques! The stiff starter allows you to get the best results in longer and more complex leavening (as in the case of the panettone or colomba) and it also needs more care, but before you start, take a look at liquid starter… it could be your thing! At this point you are ready to indulge yourself and put your hands in the dough to churn out a nice focaccia or pizza, for a more fragrant and digestible result than those made with instant yeast!
ADVANTAGES:
DISADVANTAGES:
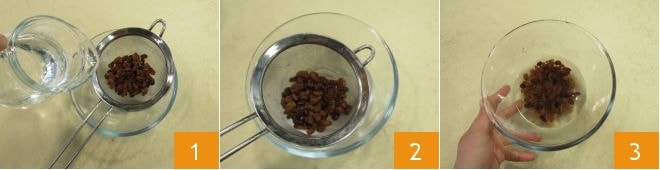
The sourdough starter comes from the fermentation that takes place by combining water and flour, but it takes a long time. To reduce the time considerably, it is possible to prepare a starter, adding ripe fruit, yogurt or honey to these two ingredients. We have chosen to use raisins. To prepare the starter, which will be our "trap" to attract yeasts, the first thing to do is wash the raisins in hot water: place them in a sieve, placed on a small bowl, and pour hot water directly over them 1; then move the sieve quickly inside the bowl, then drain the raisins 2. This way you will eliminate the powders and any paraffins, but without soaking the raisins in the impure water. To do this, transfer the raisins to another bowl, add the 120 g of water and wait 20 minutes 3.
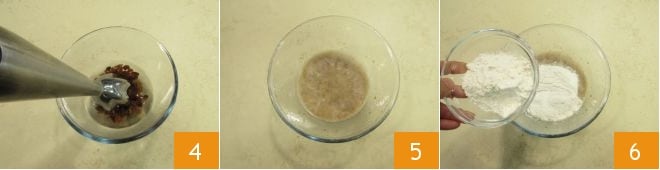
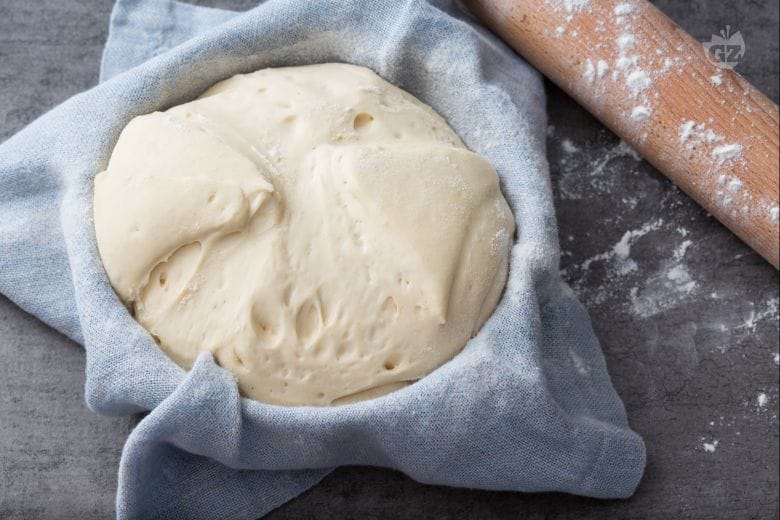
After this time the raisins will be soft and you can blend them, together with the water, using a hand blender 4. It will only take a few seconds and you will not have to obtain a homogeneous mixture, so you can leave a few coarse pieces 5. Then add both the 100 g of Manitoba flour and the 50 g of flour 0 6.
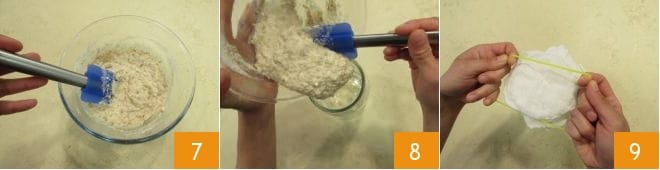
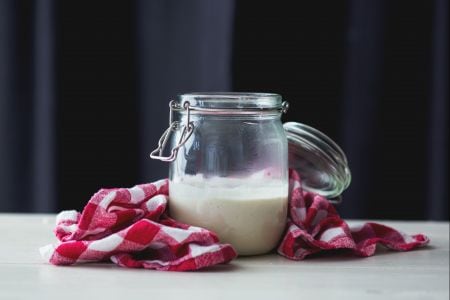
At this point, using a rubber spatula, stir the mixture until it is uniform 7. Pour it inside a large glass jar 8; the yeast must be no more than 1/6 the height of the jar. Cover with a damp cloth, in order to make it adhere better and fix it in place with a rubber band 9. After this, leave the jar at room temperature and wait 48 hours before proceeding with the feedings.
Once the microorganisms are inside the mixture, it will be necessary to regularly feed your starter for 31 days every 48 hours. By adding water and flour, the microorganisms will feed on the complex sugars, or the starches contained in the flour, and will turn into ethyl alcohol and carbon dioxide. This is precisely what will allow it to increase in volume or what is called leavening.
For a stiff starter the ratio between starter, flour and water is 1:1:0.5, i.e. for one dose of starter, the same dose of flour and half a dose of water will be needed. Regarding the choice of flour, we recommend using 2/3 strong Manitoba flour (W approx. 400) and 1/3 0 flour (W approx. 260). In this way you will get a W approx. 330 which corresponds to a flour suitable for bread or pizza.
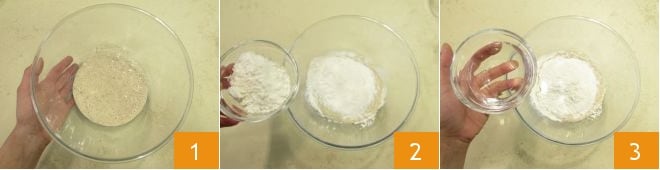
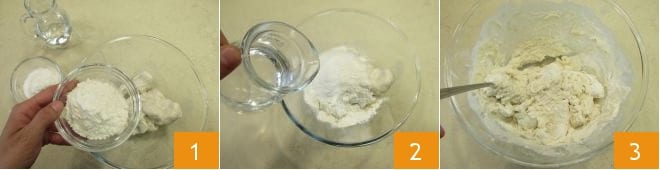
After 48 hours, feed your starter. Transfer 150 g to a bowl 1; the rest will be thrown away. Then add 100 g of Manitoba flour, 50 g of flour 0 2 and the water 3.
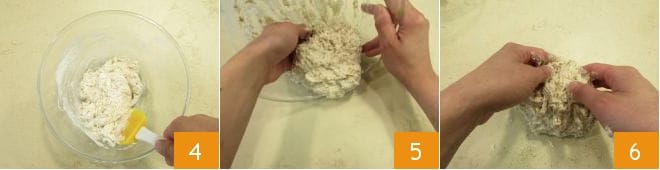
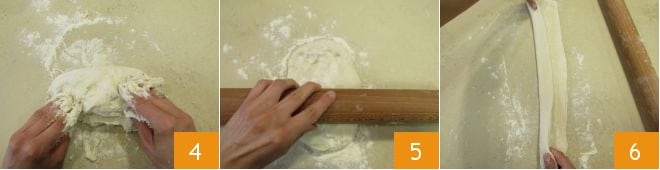
Start mixing with a spatula, collecting the powder well on the edge of the bowl 4. Then transfer it to a countertop 5 and work it with your hands for a few moments, without adding flour 6.
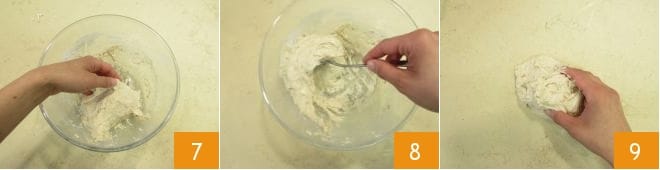
Then transfer it back to the bowl 7 and work it quickly by moving it against the walls of the bowl with a spoon 8. Transfer it again to the countertop 9 and then back into the bowl, working the mixture as done previously. These steps, made frequently, allow you to give greater oxidation and ensure a harder dough.

When you transfer the dough to the countertop, continue to work it, banging it vigorously on the surface and bringing the outer edges of the dough inwards 10. Transferring the mixture to the bowl also lets you create waterproof layers that permit you to work it without leaving too much sticking to the countertop. Once you have obtained a smooth, soft but not sticky dough 11, take an airtight glass jar and remove the rubber ring. In this way the air will be able to enter but, above all, the yeast gases will be able to escape. After adding the dough, close the jar 12 and keep it at room temperature for 31 days, feeding it every 48 hours as described. The most suitable temperature is between 72°-82°F, but if you cannot maintain such a temperature do not worry, this in fact allows you to have the right degree of acidity but does not mean that the starter will not rise at a lower or higher temperature. Furthermore, following the various feedings it will be necessary to use a smaller jar at first and then a taller jar.
If black dots appear at this stage, most likely it is mold and you will have to start over.
If you do not have an airtight glass jar, you can use a regular glass jar, without screwing on the lid too much.
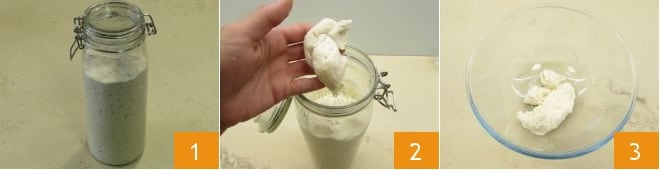
After 31 days the yeast will be ready 1. Discard the initial part 2 and use only the central part of the yeast, taking 150 g and transfer it to a bowl 3.
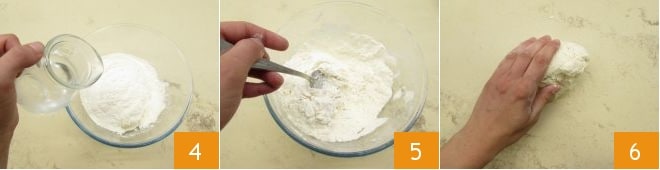
Then add 100 g of Manitoba flour and 50 g of flour 0. Add 75 g of water 4 and mix with the back of a spoon pressing the mixture on the sides of the bowl 5. At this point you can transfer it to a lightly floured counter top and proceed by hand 6.
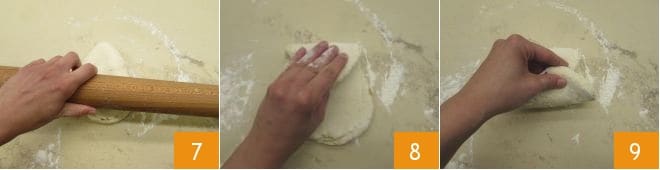
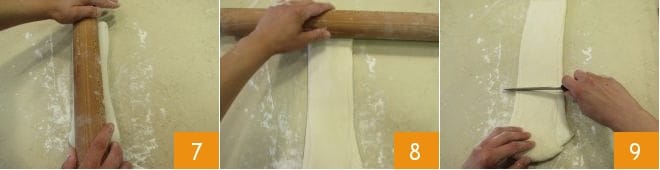
With a rolling pin, press down on the dough and roll it out 7, then fold the edges of the dough inwards (8-9).
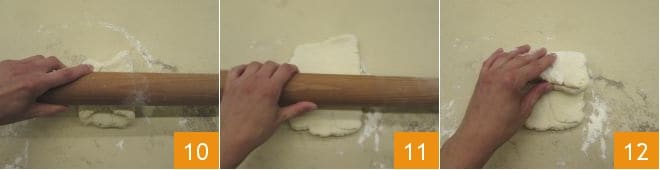
Rotate the dough seam side up. To give strength to the dough, before it is smooth, press with a rolling pin 10, roll it out 11 and fold the ends towards the center keeping the one closer to you on top of the other 12.

Then rotate the dough 90° 13 and roll it out again 14. Then fold the ends 15 again as previously described, and continue in this way until you see that the dough has acquired the right strength. That is, it will be increasingly resistant.
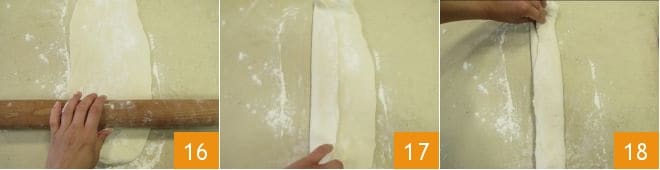
When the dough has gained strength, roll it out so as to obtain a long, narrow and thin rectangle 16. At this point, continue to fold the lengthwise parts inwards (17-18).
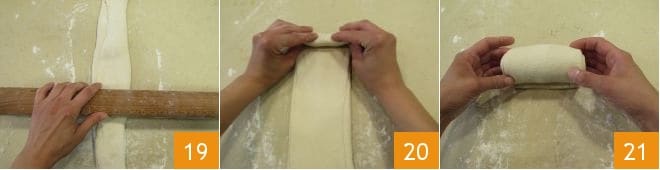
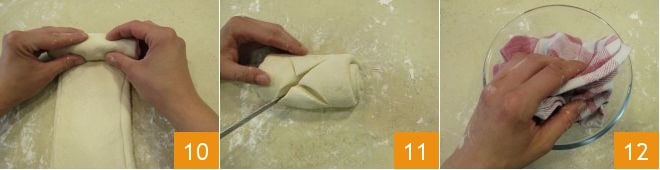
Flatten it again with a rolling pin 19, then roll it downwards starting from the end furthest from you (20-21).
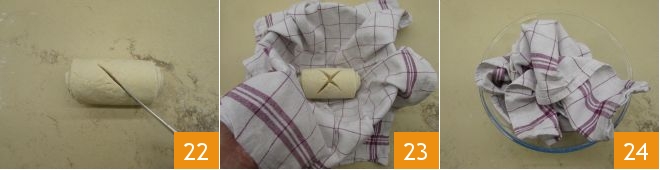
Make an X incision with a knife 22 and place the dough in the center of a bowl where you have placed a kitchen towel 23 and cover it 24. Leave to rest for 3 hours at room temperature and then put it in the refrigerator. When you pick it up, it will smell like yogurt, slightly vinegary but not pungent.
At the end of the feeding phase of 31 days, it is necessary to bathe the yeast; after this first time, this process will be done only when needed.
The bath is a yeast cleansing process. Putting water and sugar in a bowl, the antagonistic microorganisms detach from the dough to eat the sugar. In this way, you obtain ready-to-use pure yeast.
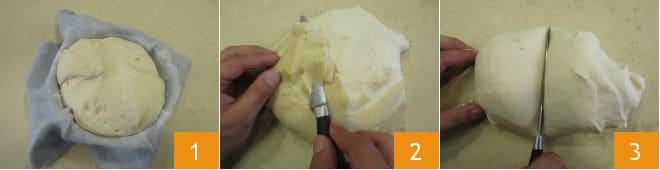
After the feeding phase of 31 days it is advisable to give the dough a bath. So, after leaving it for 24 hours in the refrigerator, take it out and proceed as indicated below. The bath is a practice to be done on a stiff starter before the first use and then only when needed. Take the dough 1 and with a sharp, straight-bladed knife remove the external part, the oxidized part 2. Then divide it in half 3 and observe your dough. You will notice a spongy consistency and a bright color.
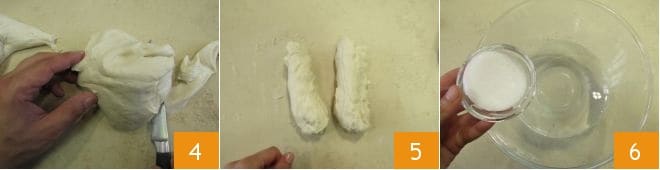
Also remove the outer part located at the base 4 in order to keep only the central part 5. Pour warm water into a large bowl, add the sugar 6, which must settle at the bottom of the bowl, without dissolving it.
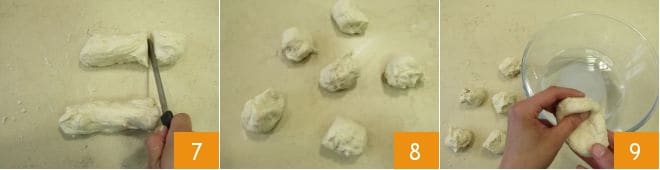
Now take the dough and cut it into pieces 7. Then take each portion and press it in your hands 8 to let the gas inside escape, folding it four times 9
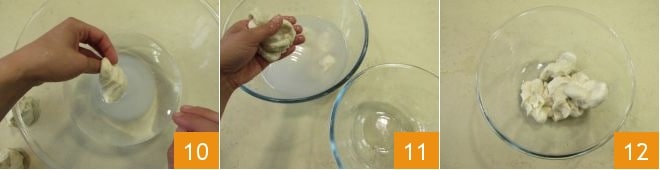
and place it inside the bowl 10. Do the same for the other pieces and leave them in the water and sugar solution for 20 minutes 11. After, squeeze the dough 12 and place it in a bowl. Now another feeding phase awaits you.
After the bath, the yeast must be fed according to the instructions in this section. For all other times, however, it will be appropriate to follow the instructions in the box “Feeding instructions once the yeast is ready”.
Put 150 g of dough into a bowl, add 100 g of Manitoba flour 1, 50 g of flour 0 and 75 g of water 2. As previously done, mix with a spoon until you get a homogeneous mixture 3.
Then transfer it to a floured surface, knead it for a few seconds 4 and, using a rolling pin as done previously, press down on the dough and roll it out, then fold the edges inwards. Keep turning the dough until it gains strength (5-6).
As soon as you have obtained a smooth dough, roll it out to form a long, narrow rectangle (7-8). Divide it into two parts 9, one will be used for your recipe and the other will be the starter for future use.
Take the part that you will use and roll it downwards starting from the end furthest from you 10. Make an X incision with a knife 11 and wrap the dough in a cloth 12. Let it rest for three hours and it will be ready to be used.
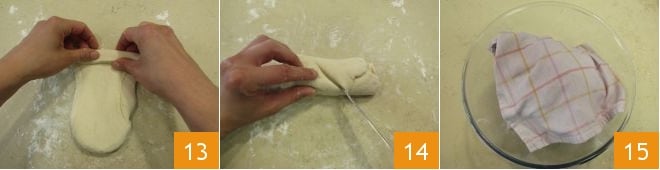
Take the other part, the one to be kept, roll it downwards as previously done 13 and make an X incision 14. Put it in a bowl where you have placed a cloth and cover it 15. This also will be left for 3 hours at room temperature, but afterwards it will be placed in the refrigerator; the yeast must never be hermetically sealed.