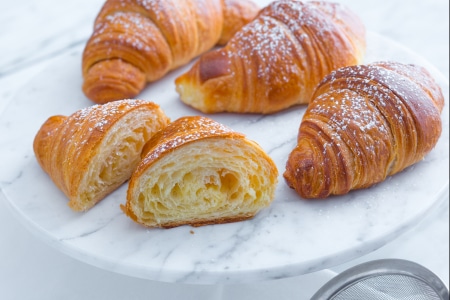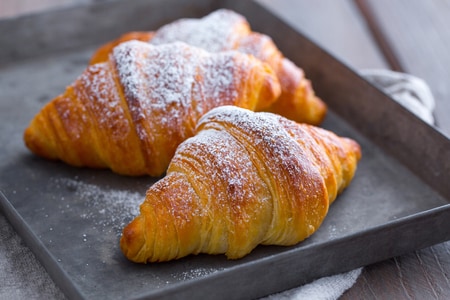
Croissants with Sourdough Starter
Croissants with sourdough starter are delicious flaky croissants perfect for breakfast. Thanks to the sourdough, they will stay fresh for a long time!
- Very difficult
- 1 h 20 min
- Kcal 425
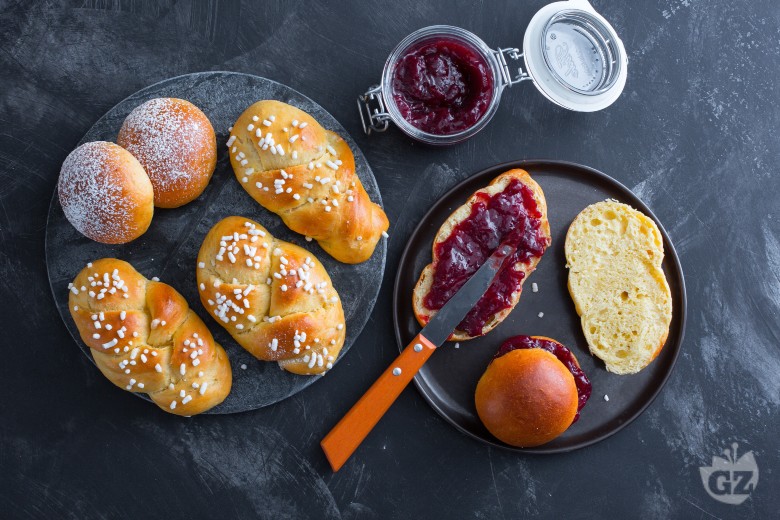
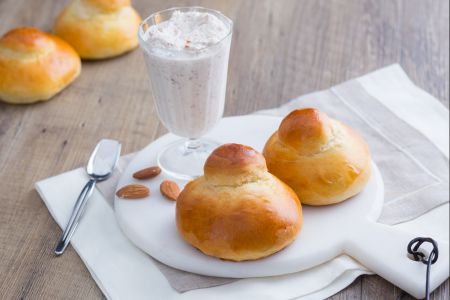
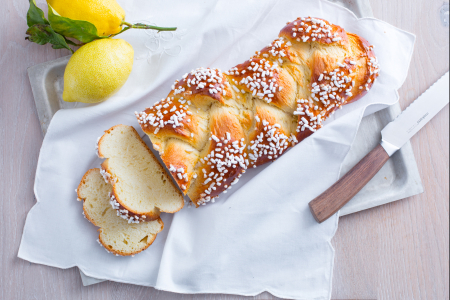
Breakfast means brioche! It’s not just an Italian custom; brioches are widespread and famous all over Europe. These soft, fluffy pastries consist of leavened dough made from egg yolks and butter and take many different shapes: classic round brioches such as mini buns, brioche à tête that have a round ball on top forming the “tête” or “head”, or braided brioches. We’ll show you how to make all three, so your breakfast is delicious every time, no matter what shape it comes in! Once the brioches are ready, you can eat them plain, sprinkled with powdered sugar, or filled with the classic pastry cream, Nutella, or jelly. With this recipe, you’ll be able to make brioches so good, the bakery will have nothing on you. If you’d like to increase the level of difficulty, you can even try two-tone croissants, Italian-style croissants, or, if you’re someone who prefers a savory breakfast, don’t miss the recipe for our plain croissants.
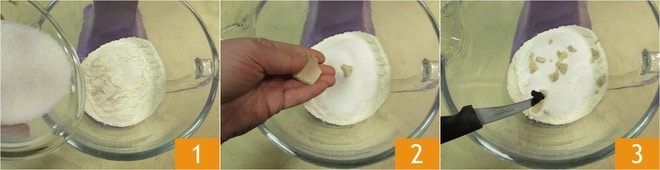
To make the brioches, start with the dough. Add the flour and sugar 1 to the bowl of a planetary mixer fitted with the dough hook attachment. Next, add the yeast (crumbled) 2, the seeds from one vanilla bean 3,

and the zest of one lemon 4. Turn the planetary mixer on medium speed and pour the water in slowly 5. Once the water has been fully absorbed, add the salt 6
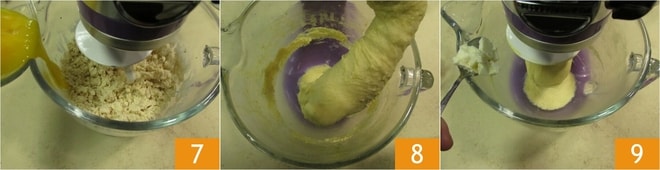
and then the egg yolks one at a time, waiting for each one to be absorbed before adding another 7. Continue working the dough until it clings to the hook 8. At this point, you’ll be able to add the butter, which should be soft but still pliable, adding it one pat at a time 9. Wait for each pat to be well absorbed before adding another. Don’t rush, or else it will be difficult to get the dough to cling to the hook again. During this step, you can stop the mixer several times and use a scraper to remove any dough that’s sticking to the sides of the mixer bowl.
Once the dough is clinging to the hook again 10, having pulled away from the sides of the bowl, transfer it to a level work surface 11. If the dough is very sticky, you can work it a little using the slap and fold technique, without beating it. To do this, just lift the dough gently, stretch it and fold it back on itself 12. If it’s still too sticky, wait a couple of minutes and then repeat the slap and fold process.
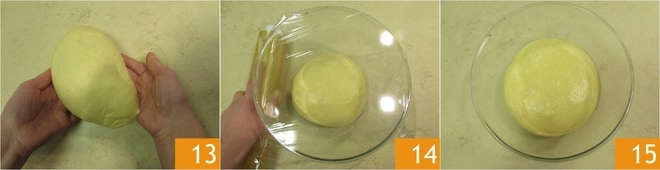
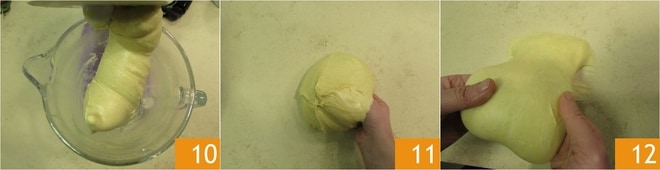
Next, round the dough, using a scraper to help remove it from the work surface, shaping it into a ball 13. Transfer to a large bowl. Cover with plastic wrap 14 and leave to rise for an hour and a half at a temperature of between 78°F and 82°F (26°C to 28°C). An ideal place would be in the oven with the oven off but the light turned on and a saucepan of hot water placed on the bottom of the oven. If this isn’t possible and you leave the dough at room temperature, protected from air currents, at a temperature lower than indicated, it may need more time to rise. Once the dough has doubled in size 15,
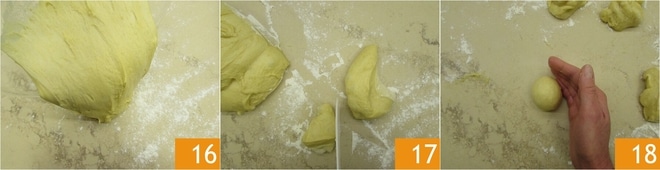
turn it out onto the work surface 16 and divide it into 18 1.75-oz (50 g) pieces 17. Take the first portion and give strength to the dough by making folds quickly, then lift an outer edge of the dough and bring it toward the center. Repeat this process several times. Round the dough pieces, quickly shaping them into little balls 18.
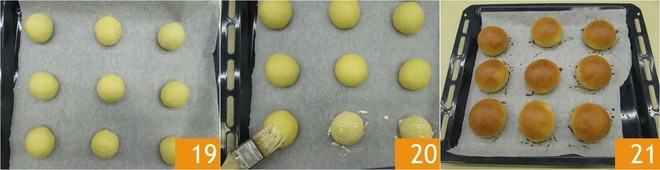
Arrange them on a baking sheet lined with parchment paper 19. Leave to rise again for one hour. Beat the egg yolk with a little cream and use it to brush the surface 20. Bake in a conventional oven preheated to 350°F (180°C) for 20 minutes. Remove from the oven 21 and serve once cooled.
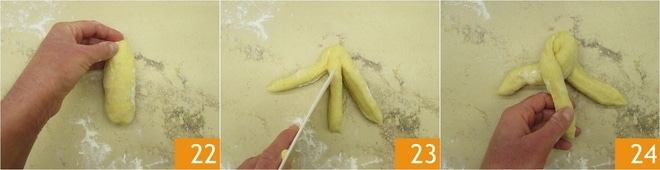
Instead of balls, you can also create braids. In this case, you’ll have to use more dough; you’ll need around ¼ lb (90-100 g) of dough for each braid. Mold the dough into a little loaf shape 22. Using a knife or scraper, make three cuts in the loaf to form three strands that are still joined at one end, so be sure not to cut all the way to that end 23. Start to intertwine the ends 24
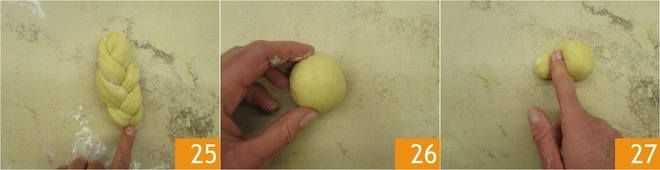
to form the braids 25. Besides braids, you can also make little brioches with topknots. Take around 1½-1¾ oz (40-50 g) of dough and shape it into a little ball 26. Then, use your index finger to form two balls, one smaller than the other 27.
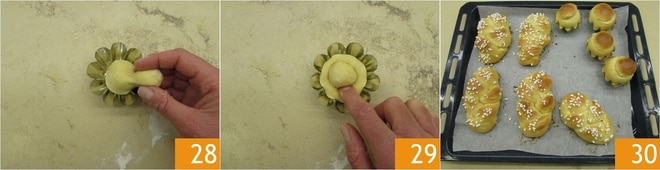
Transfer to a scalloped mold 28 and press the bottom part down lightly 26. Next, for both shapes, leave the dough to rise for an hour, then brush the surface with the egg yolk and cream glaze and decorate with braids with nib sugar. The braids will need more cooking time (around 25-30 minutes), while 20 minutes will be enough for the topknot brioches. Remove from the oven 27 and serve once cooled.