
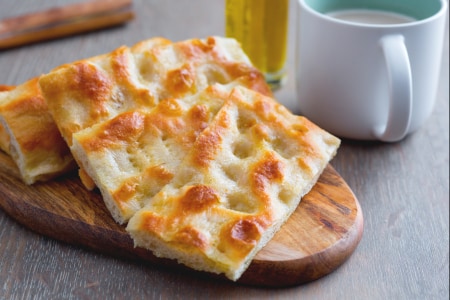
Focaccia (fügassa) alla genovese (Genoa-style focaccia)
Focaccia alla genovese, or fügassa in the local dialect, is a typical Ligurian specialty and has become an icon of the Slow Food movement.
- Average
- 45 min
There are countless ways to use it, and it’s a perennial staple in pastry shops. Along with pie dough and choux pastry, in fact, puff pastry is one of the ultimate basic recipes. Now used all over the world, the French have been going crazy for it since the 1700s. Also known as pâte feuilletée, because it is as light as a puff of air, puff pastry is a very versatile dough with a neutral flavor, making it a great base for both sweet and savory recipes! Making puff pastry takes a touch of patience and just a pinch of experience since you have to handle the ingredients gently so that the air can get between the various layers of dough and butter, and then expand during cooking through a process known as “physical leavening.” To discover all of the secrets of this dough, we invited young chef Franco Aliberti, who so passionately shared with us all of his tricks for getting the perfect result with 432 fragrant layers, to come to our kitchen and enlighten us! So, what are you waiting for? Grab your rolling pin, because here we go! Oh, and once you’ve learned this technique, why not try your hand at making our Italian-style croissants!
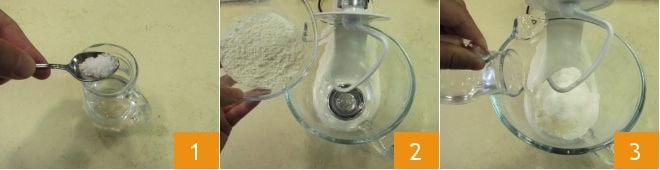
To make the puff pastry, first start by making the base dough known as détrempe. Dissolve the salt in the water in a small jug, stirring with a teaspoon 1 as you do so. Next, pour the cake flour into the bowl of a stand mixer with the dough hook attached 2, and add the water and salt 3.
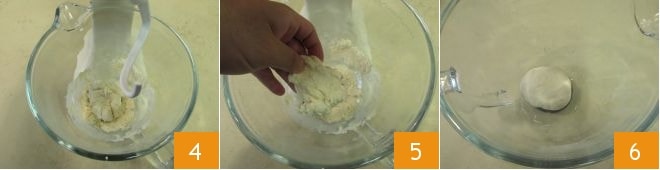
Turn on the mixer 4 and leave it to work for a few minutes. This won’t take long as you don’t need a very pliable dough. Once you’ve achieved a smooth consistency 5, use your hands to roll the dough around inside the bowl to clean it 6.
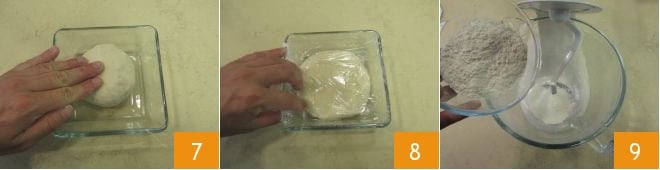
The détrempe shouldn’t stick to your hands 7. Transfer it to a shallow bowl and press it down with your hands. Cover with plastic wrap 8 and leave to rest at room temperature. Now move on to the beurrage. Dice the butter and place it, along with the cake flour 9, into the
same bowl of the stand mixer 10. Turn on the mixer, with the dough hook attached 11, and wait a few minutes until the butter has completely absorbed the flour. Take care not to work the mixture too much, otherwise, the butter will get too hot, and what you need is a compact mixture with no lumps 12.
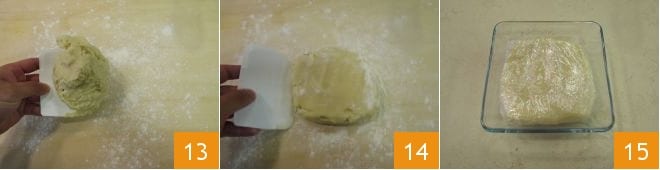
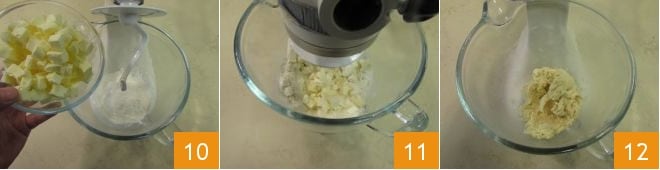
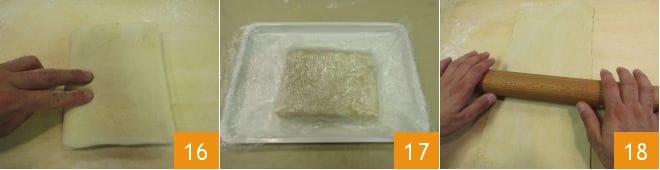
Transfer it to a lightly floured surface and use your hands and a little flour 13 to very quickly shape it into a square 14, before transferring it to a lightly floured casserole dish. Cover with plastic wrap 15 and allow to rest at room temperature for 5 minutes. If it’s become too soft, however, place it in the refrigerator for 10 minutes.
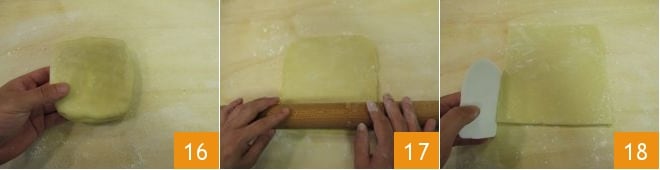
Once the beurrage has rested, transfer it to a work surface 16 and use a rolling pin and a little flour 17 to roll it out slightly 18 to obtain an 8-inch (20x20 cm) square. At this point, set it aside for a moment, transferring it to a lightly floured area of the work surface.
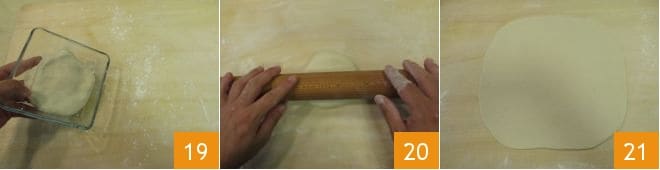
Using a dough cutter, move the détrempe to a lightly floured 19 work surface and, again using the rolling pin, roll it out 20 to a larger square of around 11x11 inches (28x28 cm) 21.
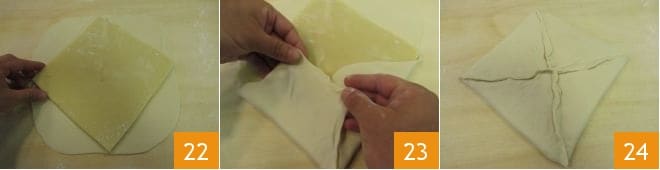
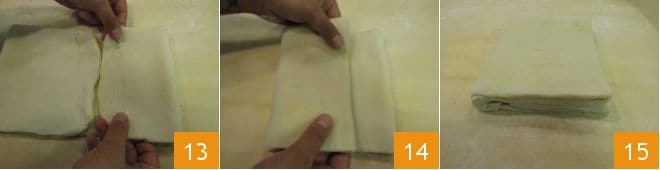
Next, place the beurrage on the diamond-shaped détrempe and enclose it by pulling the corners of the diamond up 22 and in toward the center 23. Make sure the closed corners don’t overlap one another too much, so that you perfectly enclose the beurrage 24, forming what is known as the paton. At this point, make the first fold without letting it rest first.
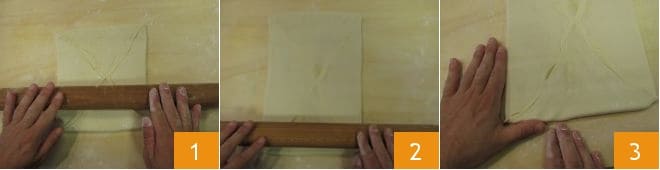
To make the first fold, first you’ll need to roll out the dough. Dust the surface with a little flour, put a little on top of the dough as well, and use a rolling pin to roll it out in front of you only 1, so that you get a rectangle that extends in length but not in width 2. Use your hands to make the corners straight 3.
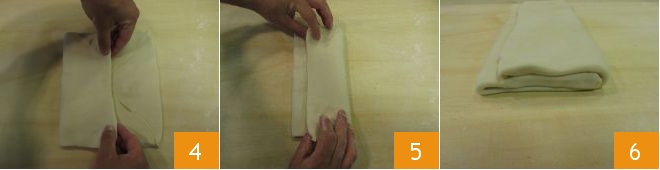
Then, turn it 90° (so that the long side is closest to you) and use a rolling pin to flatten it again slightly. Now make the first 3-part fold, bringing one side of the dough toward the center of the rectangle and placing it slightly past the middle 4. Then fold the opposite side over like a book 5. If you lift the paton up, you will notice the 3 folds 6.
Keeping the part with the folds towards you, roll out the paton slightly with a rolling pin, taking care not to overdo it 7. Next, transfer it to a tray, and apply light pressure to the pastry 8 using a finger. This will remind you how far you got with your folding. Then cover with plastic wrap to seal it 9. This will help keep the moisture inside and prevent the dough from drying out. Place in the refrigerator for 30 minutes.
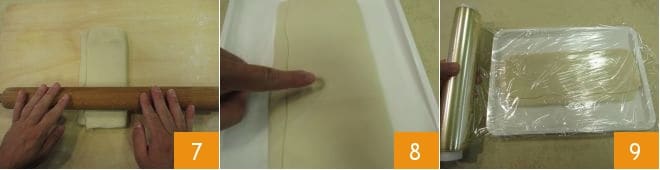
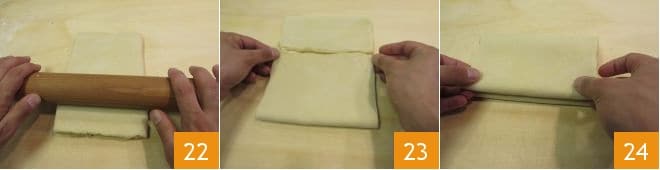
Next, take the paton again and place it on the counter so that the part without folds is closest to you. Roll it out using a rolling pin, again only in the direction of the folds (or lengthwise, so as to maintain the rectangular shape) 10 until you get a thickness of about ¼ inch (½ cm) 11. Now move on to make the 4-part fold. Just like you did before, bring one corner of the dough in toward the center, placing it slightly past the middle 12.
Then fold in the other side as well, placing it this time not on top but next to the other flap of dough 13. Adjust the edges by pulling them gently with your fingers so that they line up perfectly. Fold up the dough by lifting the first half that you folded, like a book 14, so that you now have 4 folds 15.
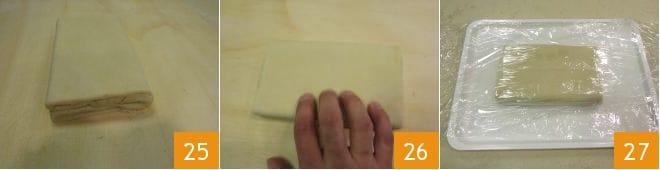
Apply light pressure, rolling it out with a rolling pin on both sides. Leave 2 fingerprints this time to indicate the two folds you’ve made 16, transfer back to the tray, cover with the same wrap you used before 17, and return to the refrigerator for 30 minutes. After the 30 minutes have passed, take the dough and roll it out, remembering to place the longer side without any folds towards you, then roll out the dough lengthwise using the rolling pin 18, again to a ¼-inch (½-cm) thickness.

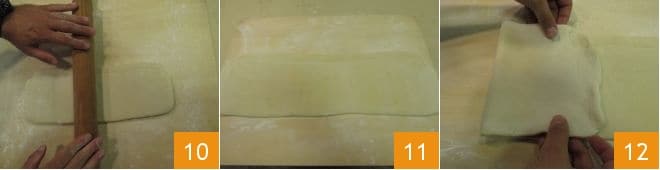
At this point, repeat the 3-part fold again (19-20). Flatten it out slightly with the rolling pin and make 3 marks on the dough to show that you have reached the third fold 21. Cover with plastic wrap and place in the refrigerator for a further 30 minutes.
After this time, take the dough and roll it out again with the rolling pin to a ¼-inch (½-cm) thickness, again with the longest, closed side facing you 22, and fold once again, this time in 4 (23-24).
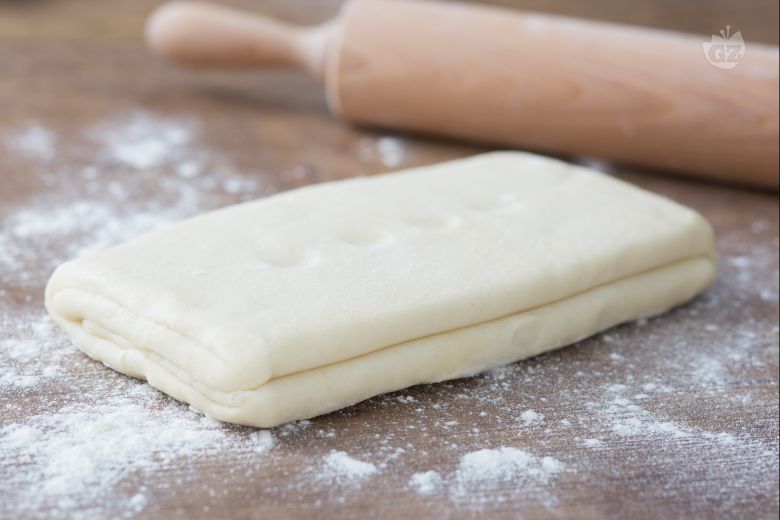
Flatten slightly with the rolling pin, again lengthwise 25, and make 4 marks with your fingers to indicate that you have completed all of the steps 26. Cover with the plastic wrap 27 again and refrigerate the pastry for at least 60 minutes before using it in your recipes.