Tiramisu cheesecake with ladyfingers
- Average
- 40 min
- Kcal 361


Birthday coming up? If the celebrant is a coffee lover, skip the usual chocolate cakes or grandma's cake for once and surprise them with a magnificent coffee cake! Unlike its water-based variant, this is a particularly scenic dessert made with a fragrant hazelnut dough and a soft coffee cream enriched with whipped cream. If the lengthy preparation intimidates you, don't worry because you can make both the base and filling the day before. This way, you will have plenty of time to get creative with the decorations and make your coffee cake even more delicious and irresistible!

To make the coffee cake, first, prepare the dough for the base: separate the yolks from the whites, then beat the whites to stiff peaks with an electric mixer 1 gradually adding the powdered sugar 2. Set the whipped whites aside for now and place the softened butter and granulated sugar in another bowl 3.

Beat the butter and sugar with the mixer for a few minutes, then add one yolk at a time 4. Dissolve the instant coffee in water and pour it into the mixture 5. Mix with the beaters, then add the all-purpose flour 6.

While keeping the mixer running, also add the baking powder 7, potato starch 8, and hazelnut flour 9.

Once the dry ingredients are well absorbed 10, fold in the whipped egg whites: first, add a small portion to temper the mixture 11, then add the rest, gently mixing from bottom to top with a spatula 12.

Pour the obtained mixture into a 7-inch diameter mold lined with parchment paper (or greased and floured) 13, level the surface with the back of a spoon, and bake in a preheated static oven at 350°F for about 45 minutes 14. Check the doneness with a toothpick, then remove from the oven and let the cake cool in the mold 15.

In the meantime, prepare the coffee cream: pour the yolks and sugar into a saucepan 16 and mix with a hand whisk or spatula 17, then add the cornstarch 18 and mix well.

Meanwhile, pour the milk and instant coffee into another saucepan 19 and bring it to a boil, stirring to dissolve 20. Pour the hot milk into the yolk mixture, first a small portion, then the rest 21.

Put the saucepan back on the stove and thicken while stirring continuously 22. When the cream is ready, transfer it to a bowl 23, cover with plastic wrap in contact 24, and let it cool in the refrigerator until ready to use 24.

At this point, soak the gelatin sheets in cold water 25. Meanwhile, pour most of the cream into a bowl and whip it with an electric mixer: it should be shiny but not too stiff 26. Heat the rest of the cream in a saucepan: once it reaches a boil, turn off the heat and add the well-squeezed gelatin sheets 27. Stir to dissolve them evenly.

Retrieve the now cold cream and revive it with a whisk, then gently fold in the whipped cream 28, mixing from bottom to top with a spatula. Finally, pour the cream and gelatin mixture into the cream and mix well to obtain a soft and smooth consistency 29. Refrigerate the cream while you cut the cake base: first, remove the top with a long serrated knife, then divide it horizontally into 2 parts 30.

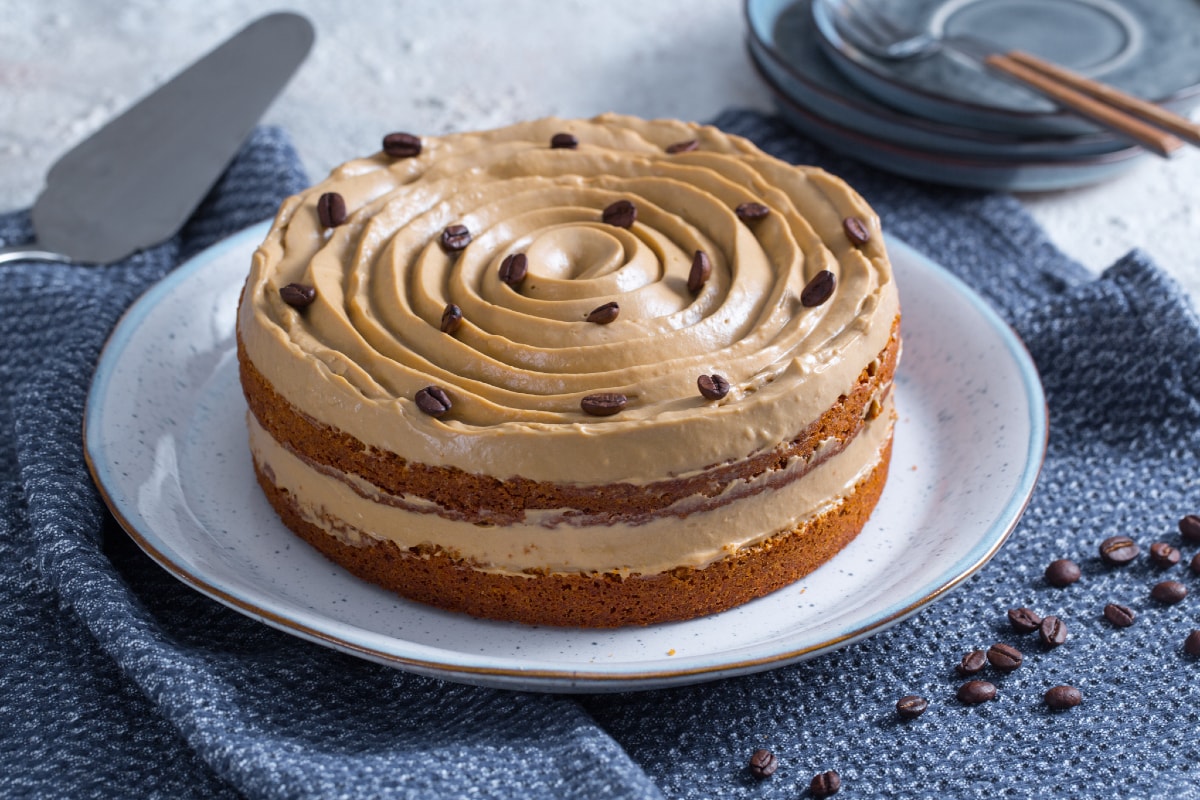
Place the base on a serving plate and fill with half of the cream using a piping bag with a half inch plain tip 31, then cover with the second cake layer 32 and smooth the edges with a spatula 33.

Fill the surface with the remaining cream using a piping bag with a Saint Honoré tip this time 34. Finally, garnish with coffee beans 35. Refrigerate the coffee cake for a couple of hours before serving 36!