
Concord Grape Ice Cream in Waffle Cone
Concord grape ice cream in a cone is a refreshing and delicious dessert made from strawberry grape ice cream and a crispy waffle cone.
- Average
- 50 min
- Kcal 259
There's nothing like an ice cream cone recipe inspired by those sunny Italian summers to really brighten a hot day. I mean, when the weather's warm and the sun's blazing, grabbing a scoop of creamy gelato in a fresh cone is a must. Making homemade ice cream cones—which is great—is a fun tradition that adds a special touch. You just mix up a basic batter, pour it on, and roll it while it’s still warm and crispy. The smell wafting through your kitchen is so, so good—like a bakery on a summer afternoon. Italians, for real, love filling their cones with classic gelato flavors. You'll see folks enjoying chocolate, sweet strawberry, or stracciatella with its bits of chocolate. Sometimes, there's a swirl of berry or a cool yogurt flavor, and every bite offers something unique.
And you know what? Strolling through an Italian piazza, you can't help but notice how everyone savors these easy ice cream cone recipes with such enthusiasm. The crunch of the cone against the cold, moist gelato is a perfect match—no question. Kids and adults alike prefer cones over cups because, basically, it turns gelato into a portable snack. Making your own cones at home lets you experiment with flavors or add your own twist—pretty much like families in Italy have done for generations. Whether you're aiming for a waffle cone recipe, a sweet sugar cone recipe, or curious about DIY ice cream cones, starting with a basic, golden cone gives you the real Italian experience.
Try dipping the edge in melted chocolate or rolling it in chopped nuts for a little extra flair. And look, it's all about keeping things simple and tender, just enjoying the moment with food that's really easy to love. So... For anyone who enjoys a mix of crunchy, cold, and sweet, nothing beats a fresh gelato cone, especially when it’s made the Italian way. It is a taste of Italy you can savor wherever you are, bringing a bit of that Italian charm right to your home.
You might also like:
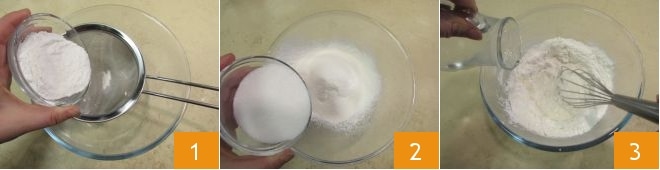
To make the ice cream cone, first gently melt the butter in a saucepan and let it cool. Sift the dry ingredients (rice flour, potato starch, and corn starch) through a sieve 1, add the sugar 2, and start mixing with a whisk while gradually pouring in the hot water 3.
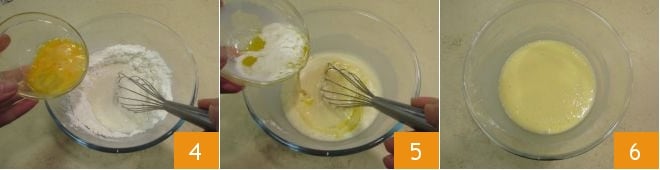
Add the egg 4 and the cooled melted butter 5, continue mixing with the whisk until the ingredients are combined and smooth, without lumps 6.
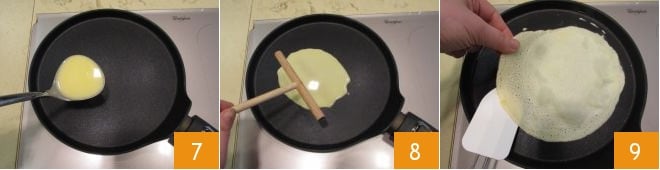
Heat a non-stick pan or crepe maker (no need to grease it) and pour a ladle of batter 7, spread the mixture with the appropriate tool 8 or rotate the pan, aiming for a thin disk about 7-8 inches in diameter. Cook for about 4-5 minutes, then flip the wafer using a spatula or a scraper 9 and cook the other side for 1-2 minutes.
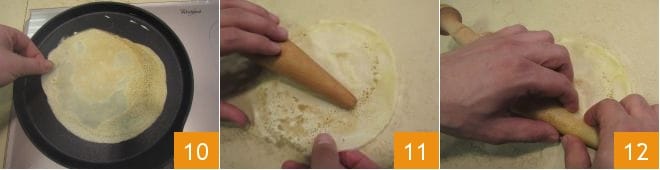
Each wafer should be nicely golden 10. As you cook the wafers, shape them while they are still hot to form the cone. Place the wafer on a work surface, lay the special cone form in the center 11, lift one edge of the wafer to wrap around the form 12.

Then lift the other edge from the opposite side 13, closing it over 14 and making sure to seal the bottom well. The cone is formed 15.

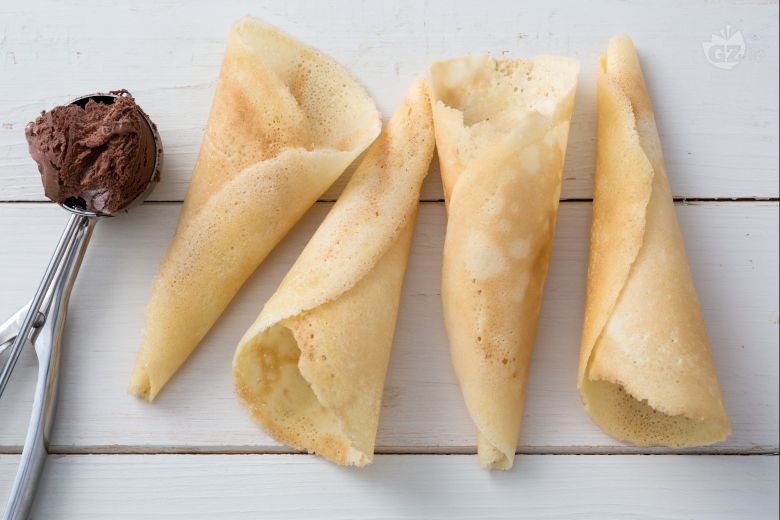
Continue using up the batter, as the wafers are ready, you can remove the previously made cones (16-17). With these quantities, you'll get about 12 cones. Your ice cream wafers are ready to be filled with your favorite flavors 18!
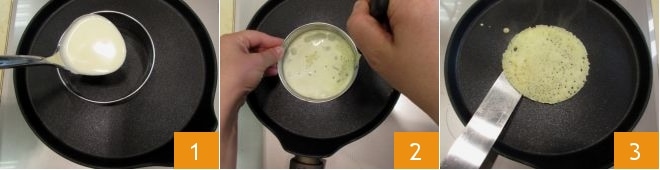
To achieve the shape of tacos made from ice cream wafers, you can proceed as follows: pour a ladle of batter into a 4-inch diameter ring mold placed on a hot griddle 1, wait 3-4 minutes for it to cook, then gently detach the edges from the ring mold 2 and flip the wafer with a spatula 3.
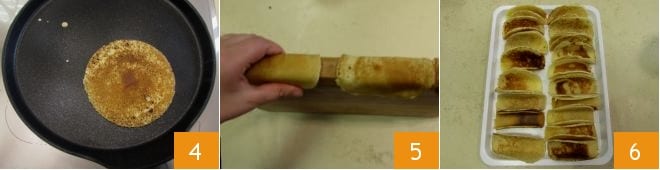
Wait a few minutes (1 or 2 should be enough) for it to become golden on the other side 4, then remove the wafer from the griddle and immediately lay it on the edge of a wooden cutting board or on a 0.8-inch thick surface to give it the typical taco shape by pressing the edges of the wafer 5. Your taco-shaped wafers are ready 6.