
Fried rice with shrimp and cashews
Fried rice with shrimp and cashews is a very tasty main dish that combines crunchiness and flavor enhanced with vegetables and soy sauce.
- Easy
- 35 min
- Kcal 567
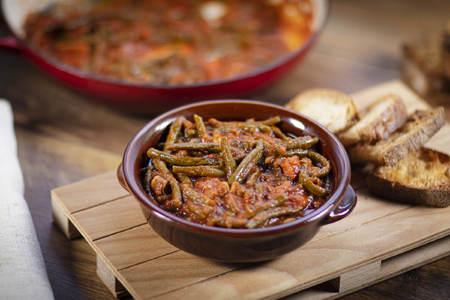
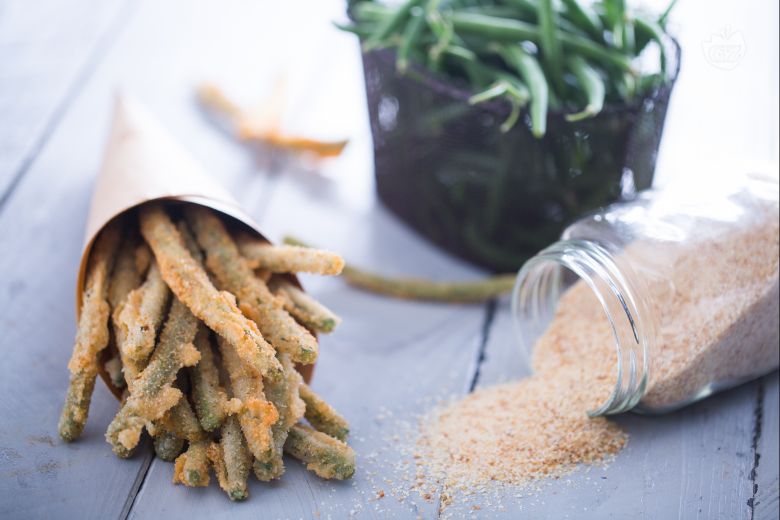
Fried green beans are a delicious snack that totally stands out, especially in Italian spots like Emilia-Romagna. Really good stuff. Here, these crispy delights offer a fun twist on veggies—like crispy fries or golden onion rings—but with a fresher vibe. They’re breaded and fried to perfection. Super crunchy outside, with just a bit of green bean tenderness inside. The deep-fried green beans? Perfect for dipping in sauces like fake mayo or something tangy. And they keep their crispiness when served in paper cones—totally like Italian markets.
Compared to typical fried potatoes, these fried green beans bring a refreshing twist. So so tasty. They’re great as a snack or an appetizer with salads, grilled meats, or even a cheese board. Kids and adults? Love them. Easy to munch on and kind of addictive with that moist, crunchy bite. If you love experimenting—and who doesn't—try different versions from across Italy: some regions use a lighter batter, like tempura green beans, while others add Parmesan for extra flavor. Every change in breading or dip gives a new twist to the crispy green beans experience. You make them once—trust me—and soon you are thinking about all the ways you can serve them. Cones, platters, surrounded by a variety of dipping sauces.
With their crunchy, golden coating and refreshing taste, these fried green bean sticks are a hit at parties or casual dinners. And listen, they bring a taste of Italy's creativity and love for food right to your table—no question.
You might also like:
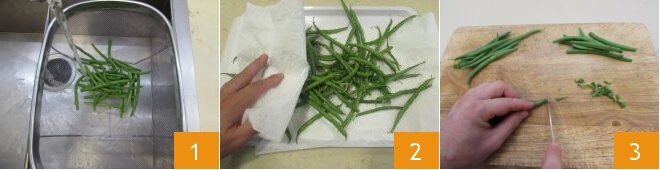
To prepare the fried green beans, start by cleaning them. Rinse them under running water 1, drain them, and then dry them with paper towels 2. Move to a cutting board and remove both ends with your fingers or a knife if you prefer 3.

Move on to the batter: pour the flour into a bowl and add a little water at first 4. Then blend with a whisk 5 until you form a sticky mass onto which you can then pour the remaining water, continuing to stir 6.
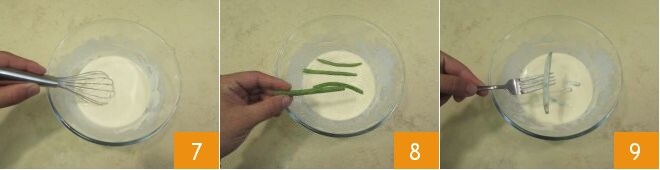
Once you have obtained a smooth, lump-free batter 7, dip the green beans a few at a time 8 and lift them with a fork to avoid messing up your hands 9.
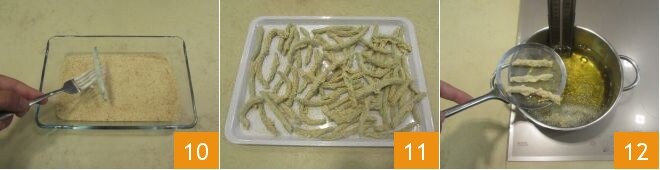
Then roll them in breadcrumbs 10 and continue until they are all breaded, placing them one by one on a tray 11. Meanwhile, put a pan on the stove and heat the oil. Remember that the ideal temperature for this frying is between 338°F and 356°F (measure with a kitchen thermometer). So, to prevent it from dropping too much, for a crispy and dry fry, immerse a few pieces at a time using a slotted spoon 12.
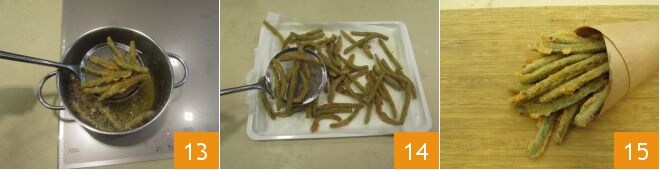
After 2-3 minutes of cooking, drain the fried green beans by scooping them up with the slotted spoon 13 and place them on a tray with paper towels 14. Continue with all the others and at the end of cooking, if you prefer, salt them. Your fried green beans are ready to be enjoyed... very hot, of course 15!