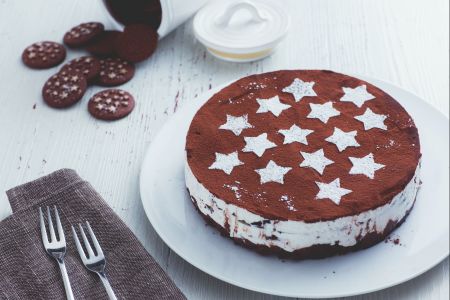

Red velvet yule log
Red velvet yule log is an elegant and delicious dessert for the Christmas and New Year's holidays. Discover the amounts and steps for preparing it!
- Average
- 2 h 20 min
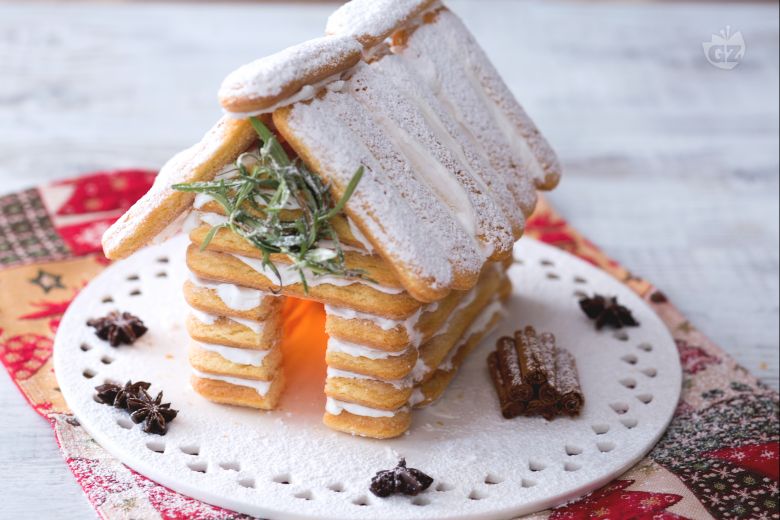
The gingerbread house is an essential Christmas dessert, impressive as a centerpiece for Christmas Eve and the entire festive period. If you too are a fan of the Gingerbread house but are in search of an innovative idea for this year, you'll fall in love with the recipe you're about to read! The ladyfinger Christmas house immediately evokes a festive atmosphere, with its ladyfinger "planks" used to make its walls and the delicate royal icing on the roof that simulates fresh snow as it falls onto wood cabins in the mountains. With a little light inside that conjures up the warmth of a fireplace, the ambiance will be all the more magical. Make your table unique in the company of your friends and family, as you admire the ladyfinger Christmas house!?
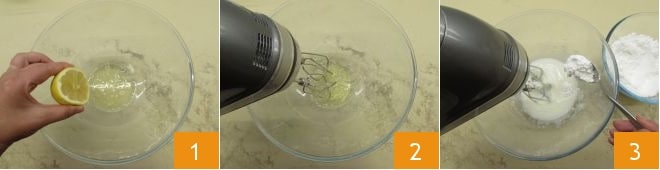
To prepare the ladyfinger Christmas house start by making the royal icing. Place the egg whites in a bowl, add 2-3 drops of lemon juice 1; start beating with an electric whisk 2 and gradually add the powdered sugar 3
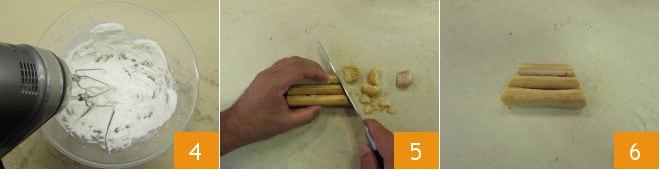
to obtain a smooth and firm glaze 4. Now start composing the front part of the house. Take 3 ladyfingers and tip them obliquely. You'll need to create a trapezoid, with a 4 inch upper edge and a 2 inch lower edge (5-6).
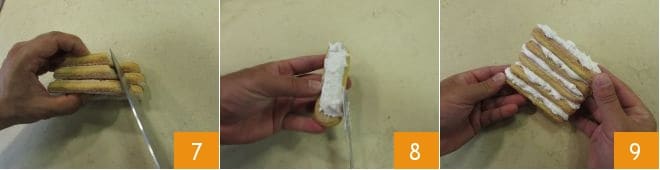
Make another one, once more using 3 ladyfingers, just like the previous one (which you can use as a template, so that you make them the same size) 7. Leave to one side. Take another whole ladyfinger, cover one of the bases with the royal icing 8 and place another ladyfinger over the icing, then cover with more icing. Continue until you have added 5 whole ladyfingers in this way 9.
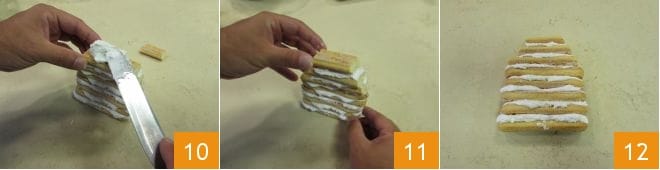
Take the trapezoid and now add the three ladyfingers that make up the previously made trapezoid, from the biggest to the smallest, always alternating with the icing, so that they stick together (10-11-12).
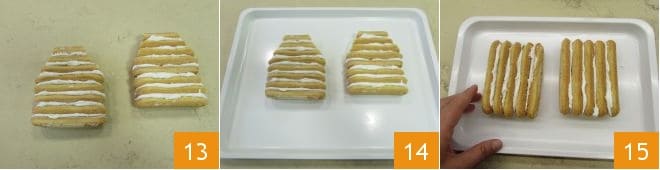
Prepare another block that is identical to this one (for the back of the house), by repeating all the steps (from 8 to 12). Now place both blocks on a tray 13 and leave them to dry 14. In the meantime, prepare both side blocks too: you'll only need to stick 5 whole ladyfingers together per block, once more spreading the icing in between them 15. Leave them to dry on a tray, once more at room temperature. Drying times may vary, but don't rush things and make sure all the pieces are thoroughly glued together before continuing.
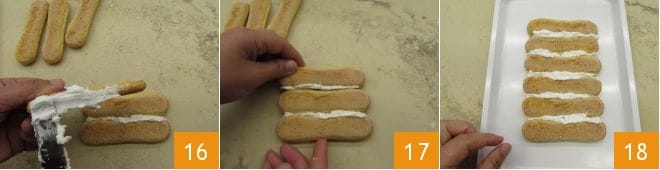
Now prepare both parts of the roof: you'll need to glue 6 ladyfingers together per side. However, this time you'll need to apply the icing on the side of each ladyfinger 16. Place them side by side and make sure they stick together thoroughly 17, before leaving them to dry 18. In the meantime cover the glaze with a damp cloth and stir occasionally.
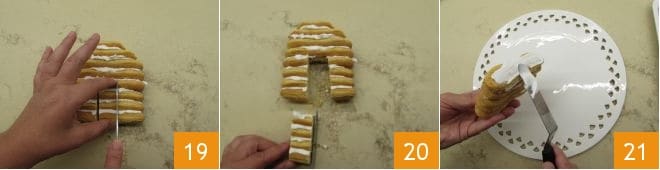
Once fully dried and solidified, you can start to assemble the ladyfinger lodge. Now take one of the two facades consisting of 8 ladyfingers and use a serrated knife to create the door. You'll need to cut out a rectangle in the middle, around 1.2 inches (3 cm) wide and the length of 4 ladyfingers (19-20). Now take the side part, which will have fully dried (the one consisting of 5 ladyfingers), brush some royal icing onto the base 21
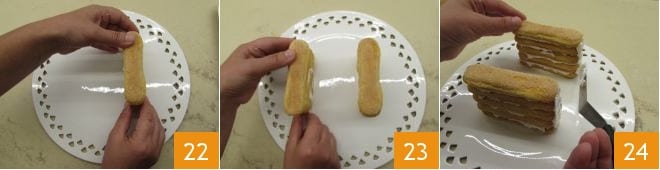
and position it on the side of the plate 22. In this way it won't move once dried. Do the same for the other block of 5 ladyfingers: spread the icing over it and position it parallel to the other block, one ladyfinger's length apart (so 4 inches) 23. Now you'll need to "glue" the back and the front of the lodge onto the side blocks: to stick the back on (the block of 8 ladyfingers without the door), delicately spread the icing along the connecting point, without moving the blocks 24
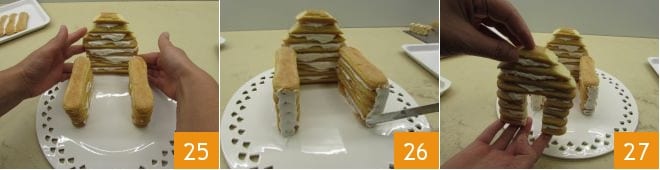
and stick the doorless block on 25. Repeat the same procedure for the front part of the house (26-27).
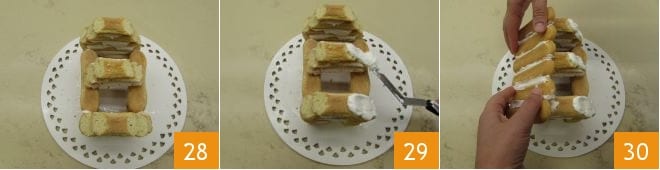
Now prepare another 3 ladyfingers, which will be your beams: they will help keep the roof up. Tip them obliquely (as you did in step 5, with the same measurements from the biggest to the smallest) and use the royal icing to stick them on, half way along the 2 side blocks 28. Now leave to dry fully. Spread the icing on the oblique cut out parts 29 and delicately apply one side 30,
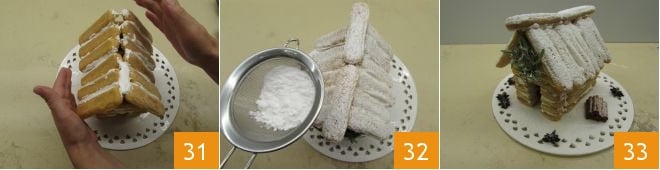
then the other 31. Now take another 2 ladyfingers, spread the icing on the base and position them lengthwise, one after another, on the part where both sides of the roof come together. Sprinkle with powdered sugar 32. Then prepare the wreathe by weaving together two rosemary sprigs, staple them together if necessary. Slot a piece of the stick between two ladyfingers, into the icing, and use it to hang the wreathe. Decorate the cabin with the pieces of star anise and cinnamon sticks, arranging them into a log pile.