
Biscotti esse
The 'esse' cookies are delicious and crumbly cookies made with a whipped shortcrust pastry and half-dipped in dark chocolate.
- Average
- 45 min
- Kcal 289
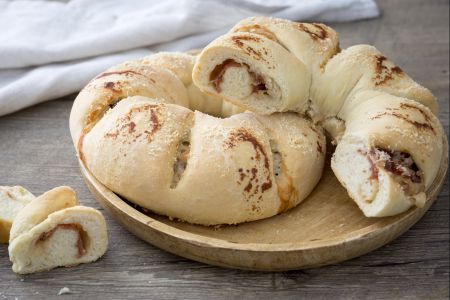
Esse bread from Emilia Romagna fills your kitchen with this sweet, nostalgic aroma—takes you straight back to those old family tables in northern Italy. I mean, its unique character comes from a bit of lard mixed into the dough. Makes the crust crispy and the inside tender and light. Locals call it "crocetta" or "barilino," depending on the shape. You know, it always has that shiny, golden exterior and a moist crumb. Perfect for any meal. The homemade version? Something special, really. Patience required, but the reward? Seriously good—a loaf that's both soft and sturdy. Smells like Sunday lunches and big family gatherings.
Though it's nothing like banana bread or an easy banana bread recipe, esse bread is really really rooted in the region’s tradition—bringing everyone together at the table. And listen, what's cool about esse bread is how it stands apart from treats like moist banana bread or those quick loaves you’d find in a loaf pan. Pretty simple ingredients, no baking powder or vanilla extract. Just basics and a bit of effort. The lard keeps it tender longer, and the crust? Still golden after a day or two. In various towns around Emilia Romagna, you’ll notice little variations—some make it a twist, others stick to the classic S shape. Thing is, no matter how it’s formed, it complements everything from soups to slices of prosciutto. Perfect for big gatherings.
While others might swear by their best banana bread or homemade banana bread, in Emilia Romagna, esse bread is the real deal. Brings out stories, makes everyone linger at the table. From kneading to smelling that fresh bread right out of the oven, it feels warm and kinda magical. And more than just bread; it’s a tradition that connects past and present. Makes each bite a journey through time, for real.
You might also like:
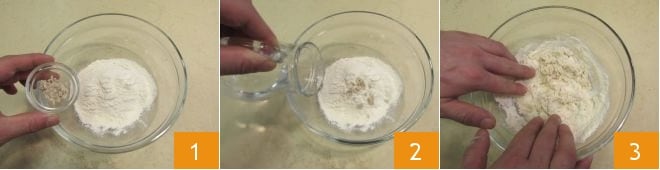
To prepare S bread, start making the starter dough at least 8 hours before (you can start the evening before to bake the next day). Pour the flour into a bowl, crumble in the fresh yeast 1, and gradually add room temperature water 2. After gathering the ingredients with a fork, knead with your fingertips to combine 3.
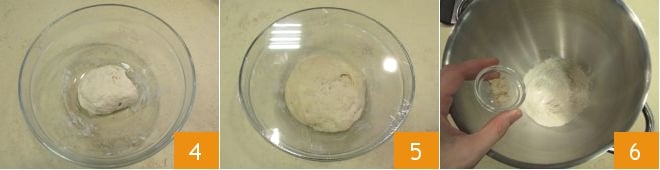
Form a small dough ball 4, cover with plastic wrap, and let it mature at room temperature for at least 8 hours. As soon as the starter dough is mature 5, you can start working on the dough. In a stand mixer fitted with a dough hook, pour in the flours, the yeast 6,
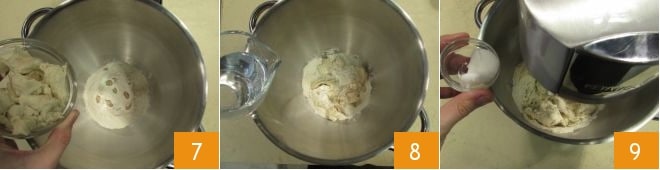
125 g of starter dough 7, and all the water 8. Turn on the stand mixer at low speed for 7 minutes, after which you can add the lard 9,
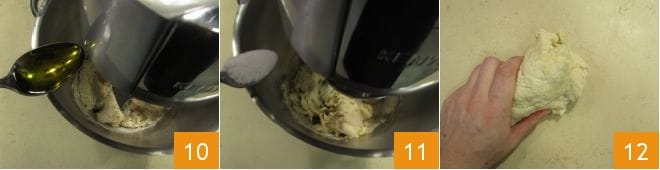
the oil 10, and the salt 11. Continue kneading for another 7-8 minutes, until the dough clings to the hook and appears compact. Then transfer it to the work surface, knead it with your hands 12, and quickly shape it into a ball.
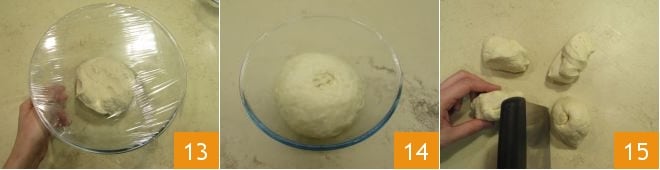
Place it to rise for 2 hours in a bowl, covered with plastic wrap 13, in the oven turned off with the light on. After 2 hours, take the risen dough 14, gently transfer it to the work surface and divide it into 4 15.
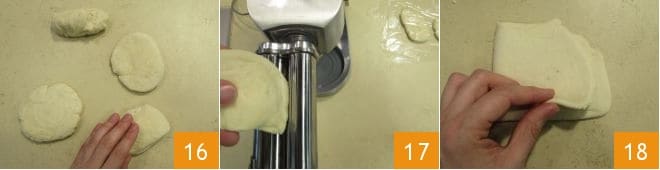
Flatten the dough pieces by pressing them with your hands 16. Take one dough piece, keeping the others under plastic wrap, and pass it through a pasta roller on the widest setting 17, then fold it in half 18, rotate it 90°, and pass it through the roller again, repeating this operation 15-18 times to refine the dough.
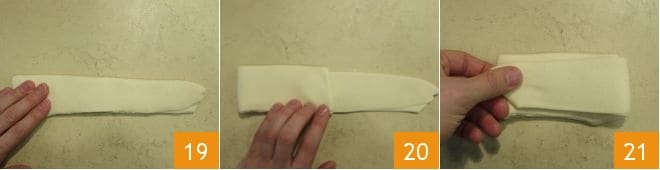
As you roll the dough, try to always obtain a smaller rectangle, you should get one about 1.5 inches wide 19. Then fold the outer flaps, making a three-part fold (20-21), and widen it one last time in the pasta roller.
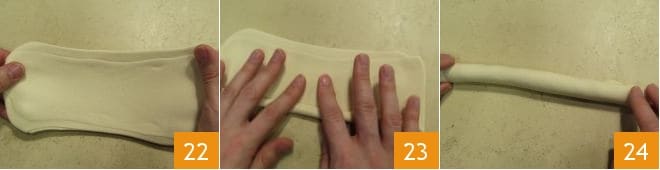
You should obtain a rectangle of 6x4 inches 22. Roll it from the longer side 23 and form a cylinder about 4 inches long 24.

Proceed the same way with the other 3 dough pieces; as you make the cylinders, keep them aside covered with plastic wrap 25. Once all 4 cylinders are obtained, stretch them to about 12 inches long 26, then roll one side halfway 27.
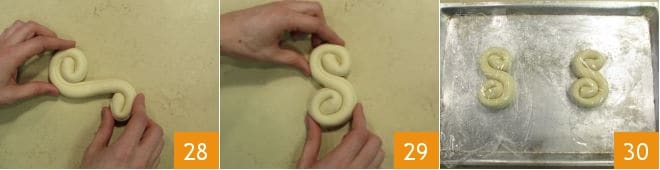
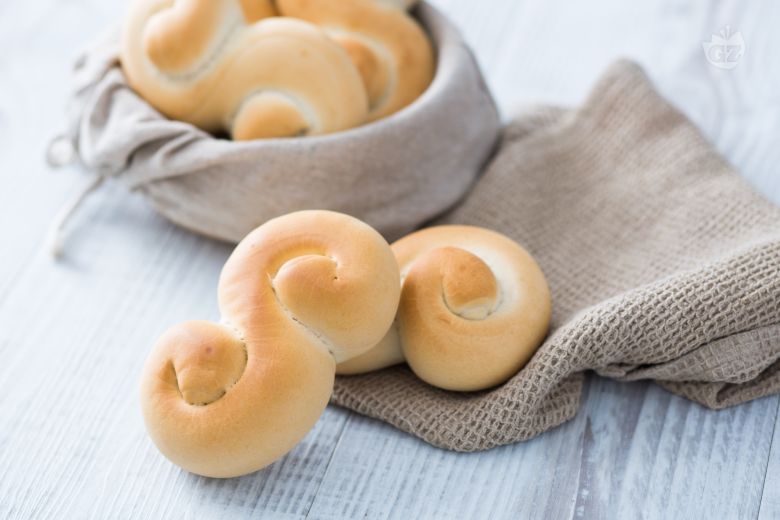
Do the same from the opposite side, reversing the rotation direction 28 to get the typical S shape 29. Transfer the rolls to a baking tray, cover them with plastic wrap, and let them rise for another 2 hours in a warm place.
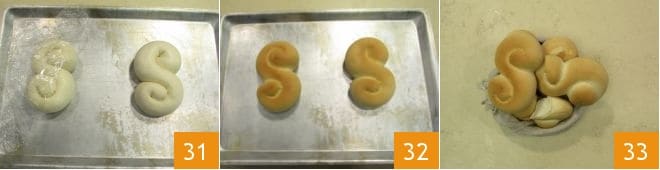
When the rolls have increased in volume, they will be ready for baking 31. Bake them in a preheated static oven at 390°F for 30 minutes. Once the time is up, the rolls will look golden on the surface 32, let them cool slightly and serve them 33.