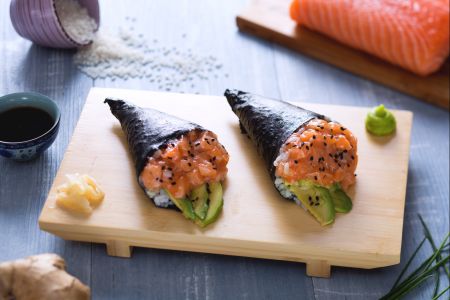
Salmon Temaki
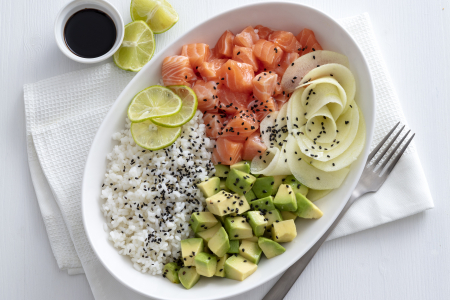
Salmon temaki is one of the tastiest sushi dishes: a cone of nori seaweed filled with rice, avocado, and Norwegian salmon!
- Difficult
- 60 min
- Kcal 673
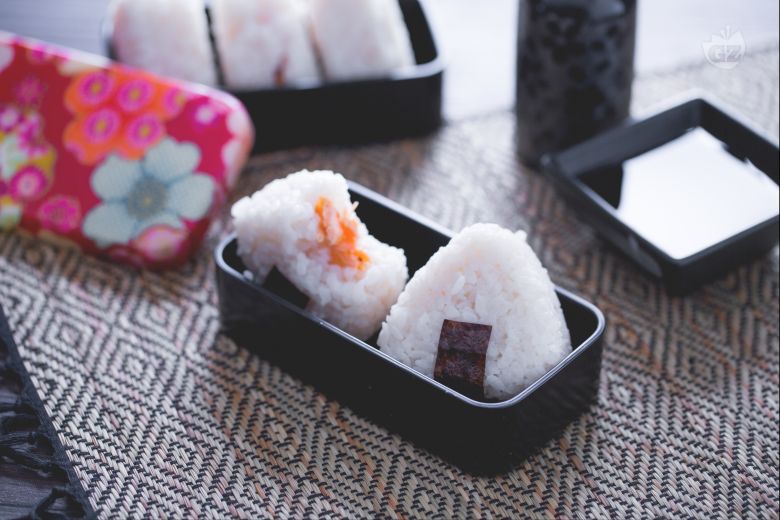
Onigiri, or Japanese rice balls, are pretty much all about simplicity, yet they make Japanese food so, so intriguing. You see these little triangles or round snacks everywhere—really, from bustling Tokyo train stations to cute bento boxes. It starts with moist, sticky rice. Really important, you know? Getting that tender texture just right is crucial so the rice sticks without getting mushy. Then, shape the rice into triangles, cylinders, or little balls. Fill them with yummy stuff like grilled salmon, tuna mayo, or even pickled plum. A strip of nori seaweed wrapped around the outside adds a bit of crispy snap—keeps your hands clean too.
Decorating onigiri with patterns or cute faces? That’s a big deal for bento lunches—makes everything look fun and inviting. With so many onigiri fillings and decorations, you can get super, super creative and make your own style each time.
What’s cool is how homemade onigiri aren’t just snacks; they pop up at picnics, school lunches, and even as part of a bigger Japanese meal with stuff like ramen or miso soup. Osaka folks might grab takoyaki as a street snack along with their favorite rice ball. And you know what? Outside Japan, onigiri is getting more popular thanks to Japanese cartoons where someone’s often munching on a sweet or tangy rice ball. Trying different onigiri variations lets you experiment—some enjoy spicy fillings, others stick to classics like salted salmon.
The best part of learning how to make onigiri? Personalizing each one—maybe toss in some sesame seeds or try out cool shapes. It’s about the golden look and neat presentation as much as flavor. Whether you’re packing a lunch or setting up a little snack spread at home, this easy onigiri recipe? It works for all tastes and occasions. Plus, pairing onigiri with sushi or miso soup makes for a really, really good meal, blending textures and flavors that are both satisfying and fun. Seriously good.
You might also like:
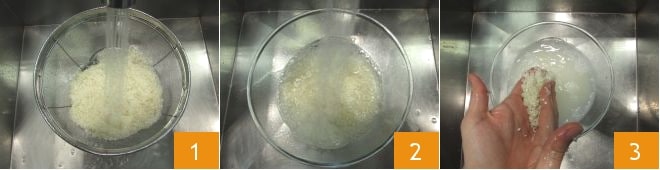
To make the onigiri, start by preparing the rice: place the rice in a sieve and rinse it well under running water 1, then transfer it to a bowl and fill it with water 2. Rub the rice grains together with your hands 3,
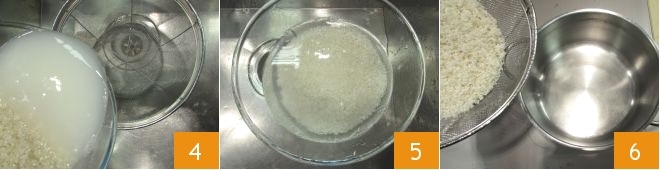
then change the water in the bowl to remove the released starch 4 and repeat the same operations until the water is clear 5. At this point, pour the rice into a saucepan 6,
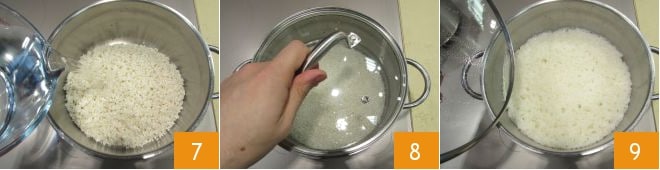
add 600 g of water 7, cover with a lid 8 and bring to a boil over medium heat. When the water comes to a boil, lower the heat to the minimum and cook the rice for about 12-13 minutes, always with the lid on. After this time, check that the rice has absorbed all the water 9, then turn off the heat and let the rice rest in the pot with the lid on for another 10 minutes.
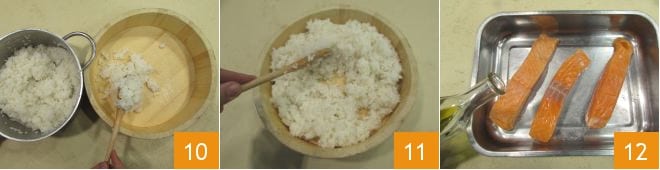
Transfer the rice to the hangiri, the special wooden bowl 10, and gently mix with the wooden paddle to cool the rice 11: the rice should not cool completely. Move on to preparing the fish for the filling: season the salmon with oil 12, salt, and pepper, turning the fillets on all sides to ensure they are evenly flavored.
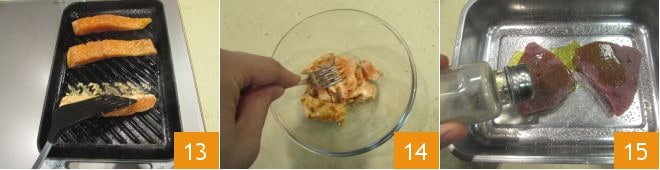
Heat a grill well and cook the salmon for 3 minutes on each side 13, then transfer it to a sheet of paper towel to dry it from the residual oil, if desired, transfer it to a bowl and break it up roughly with a fork 14. Proceed in the same way with the tuna: season the fillets with oil, salt, and pepper 15,
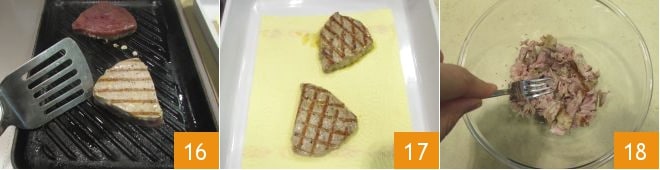
grill them for 3 minutes on each side 16, gently dry them on paper towels 17, then break the tuna into pieces in a bowl using the tines of a fork 18.
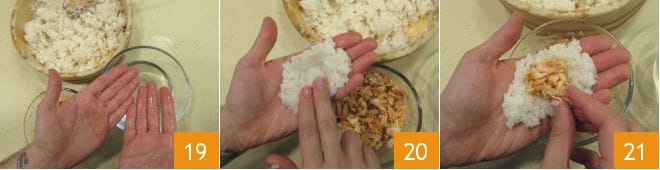
At this point, you can start assembling the onigiri: wet your hands in a bowl full of water, to better handle the rice 19, then rub your palms with some salt to flavor the rice while forming the rice balls. Take a handful of rice and flatten it in the palm of one hand 20; add a generous spoonful of salmon or tuna pieces 21
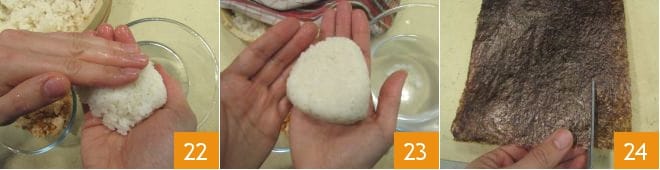
and cover with another portion of rice 22, then shape the rice between your hands into a triangle shape 23. Keep in mind that each triangle will require about 100 g of rice, and with these quantities, you will obtain about 10 onigiri. Now take the sheet of nori seaweed and cut it into strips about 2 cm wide 24
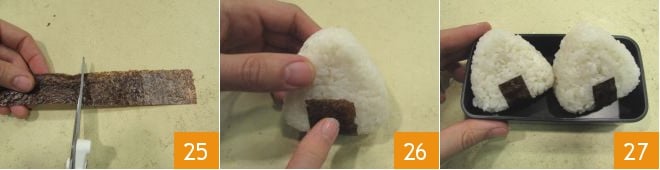
and 5 cm long 25. Attach the obtained strips to the base of each onigiri, pressing on the rice until they stick on their own 26. Your onigiri are ready to be enjoyed 27!