Chocolate coconut bars
Chocolate coconut bars: a timeless pairing for a delightful treat. Easy to make, perfect for occasions or a special Valentine's gift.
- Easy
- 60 min
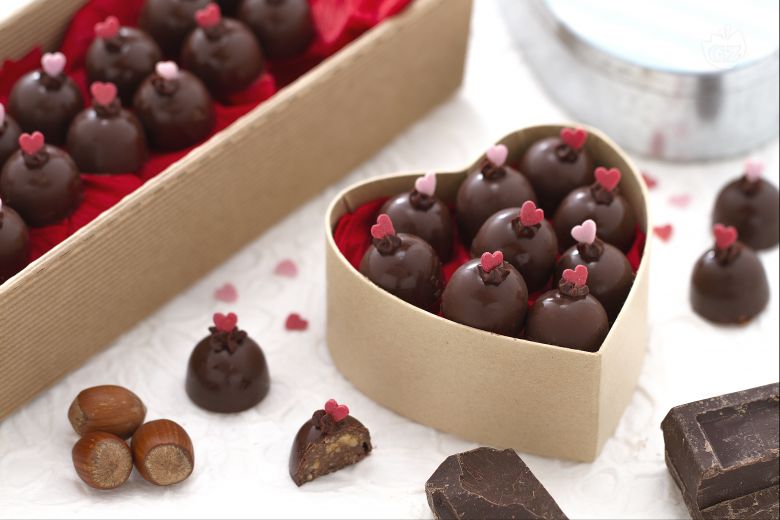
For a truly special gift for your sweet other half this Valentine's Day? Try these chocolates by GialloZafferano: small dark chocolate bites with a crispy wafer, hazelnut praline and gianduia filling!
A delight for the palate and a feast for the eyes, these chocolates are also suitable for other occasions, simply decorate them differently or leave them as they are, straight from the mold.
Be warned however, as in order to prepare these chocolates, in addition to excellent quality ingredients you will also need a touch of manual dexterity, experience and the right instruments, to guarantee the success of this recipe: a polycarbonate mold, a food thermometer and a marble worktop for tempering. The recipe may not live up to your expectations if you do not have all this equipment!
The chocolates will be appreciated by everyone who tastes them and they will keep coming back for more!
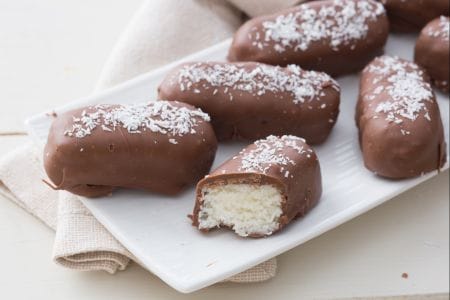
Try the recipe for Coconut chocolates too, a light version with a delicate flavor!
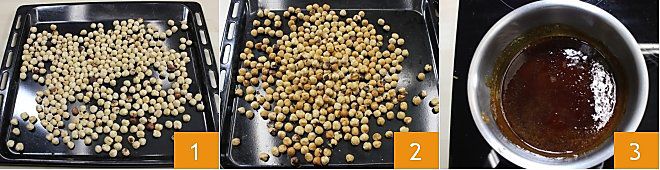
To prepare the chocolates, start by toasting the hazelnuts by placing them on a tray 1 and then in the oven preheated to 302°F for 35 minutes, until nice and golden 2. Prepare the caramel in the meantime: add the granulated sugar to a double-bottomed steel saucepan, one spoon at a time, and slowly melt on a low flame, delicately rotating the saucepan without stirring. You will make a brown caramel 3, 330.8-347°F in temperature (use a food thermometer to measure it).
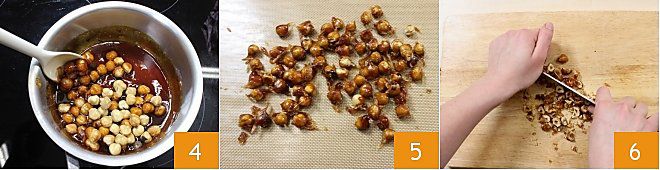
Add half of the toasted hazelnuts to the caramel and stir very rapidly 4. Place it all on a silicon mat and separate the hazelnuts 5. Use a wooden stick to avoid burning your hands. This needs to be a very quick operation, otherwise you will not be able to separate the hazelnuts in time before everything hardens. Once cooled, finely chop both the toasted and caramelized hazelnuts with a kitchen knife 6, or if you prefer, with a mixer (depending on whether you want larger or smaller hazelnut pieces).
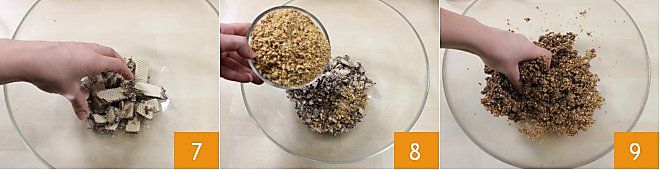
Now complete the filling for the chocolates: coarsely crumble the wafers by hand in a bowl 7 and add the chopped hazelnuts 8. Stir a little by hand, so that the wafer cream melts a little and the ingredients amalgamate 9.
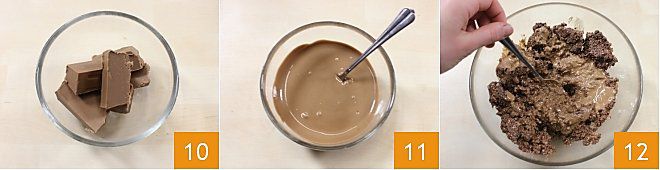
Melt the gianduia chocolate in the microwave or in a bain-marie (10-11) and add to the wafer and hazelnut mixture. Stir thoroughly 12: the chocolate filling must be soft and compact.
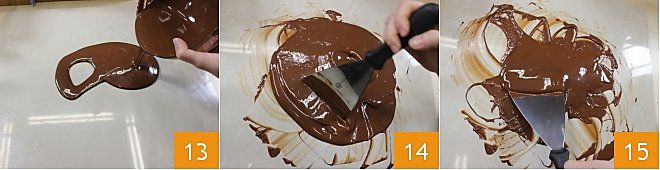
Now melt the dark chocolate. For the chocolates to be nice and shiny and not lackluster and whitish, the chocolate must be tempered, so it should never exceed 87.8°F. In this way you will make shiny chocolates that will keep for longer. This step can be completed in two different ways: either melt the chocolate in a bain-marie and continue to stir until it melts, maintaining the required temperature all the while, with the help of a thermometer. If you exceed 87.8°F, you'll need to heat the chocolate to 113°F, at most 122°F, pour 2/3 of it onto a marble top (it is not possible to do this with any other surface) 13 and use a spatula to move it rapidly (14-15), stirring continuously, until it reaches 84.2°F. Pour it into the bowl with the remaining chocolate and stir continuously until 87.8°F.
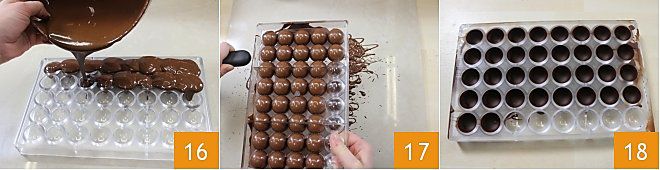
Now take a polycarbonate mold for chocolates and pour abundant melted chocolate inside 16, turn the mold over and tap it on the side for the excess chocolate to drip away 17. Remove the excess chocolate with a spatula; this step is necessary in order for the chocolate shell to form and should be carried out on a tray so as to recover the chocolate that drips away. Leave to cool quickly for a couple of hours, until little white bubble form underneath18.
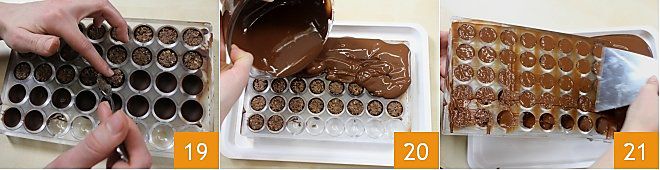
Fill the resulting shells with a spoon of filling 19, but never to the top: leave 1/16-1/8 inch of space. Melt the chocolate once more by tempering it again, and upon reaching 87.8°F, pour it over the chocolates 20 to create the bottom; remove any excess with a spatula.
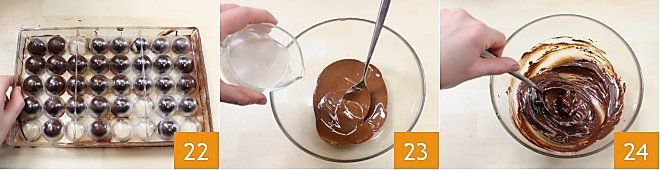
Leave the chocolates to cool for a couple of hours. When hard, delicately tap the mold on a flat surface 22 to remove them. Place them on a serving tray and prepare the ganache for the decoration: melt the chocolate, add the cream 23 and stir to amalgamate 24. Place the ganache in a narrow star-tipped pastry bag.

Decorate each chocolate with a small tuft of ganache 25, topped by a star-shaped sprinkle 26. And voilà: the chocolates are ready 27 to be enjoyed: they'll disappear in a flash!